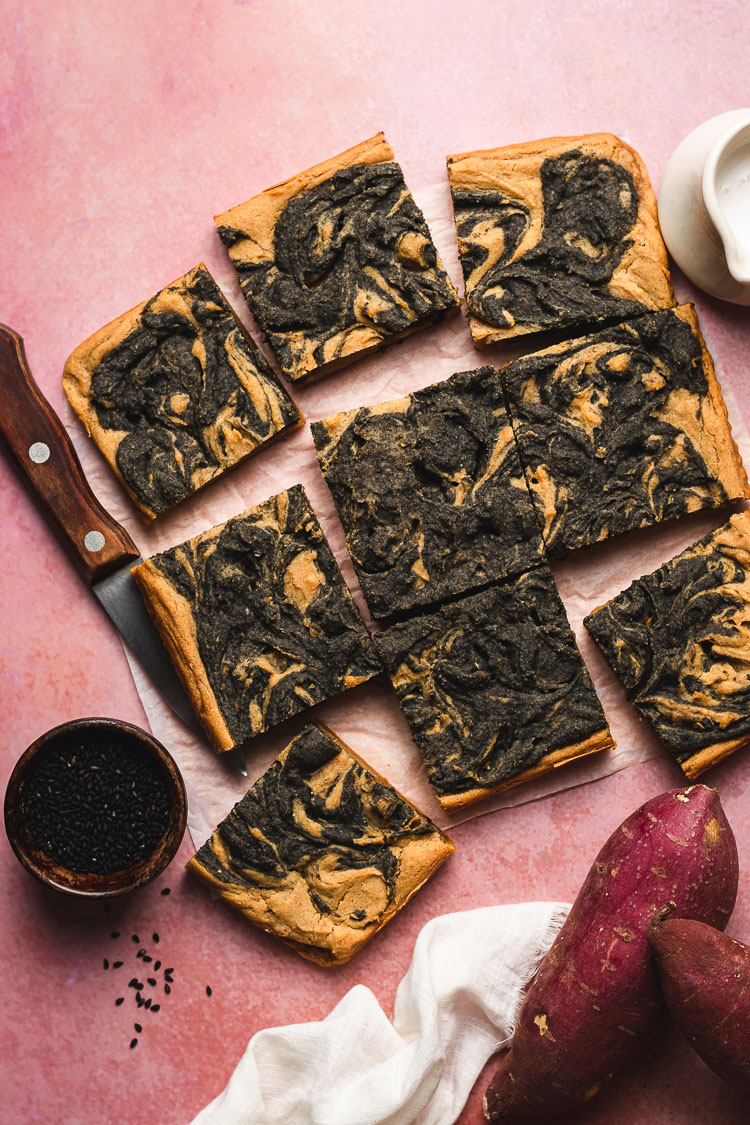
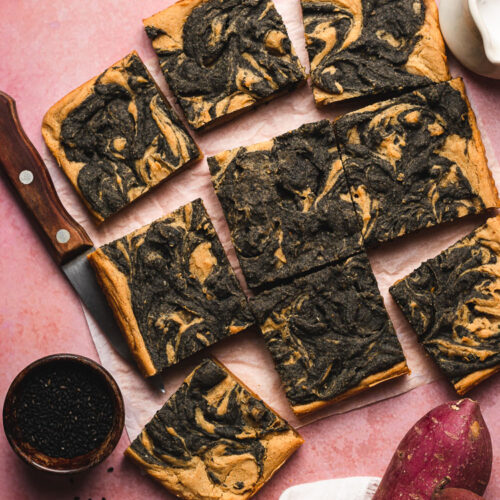
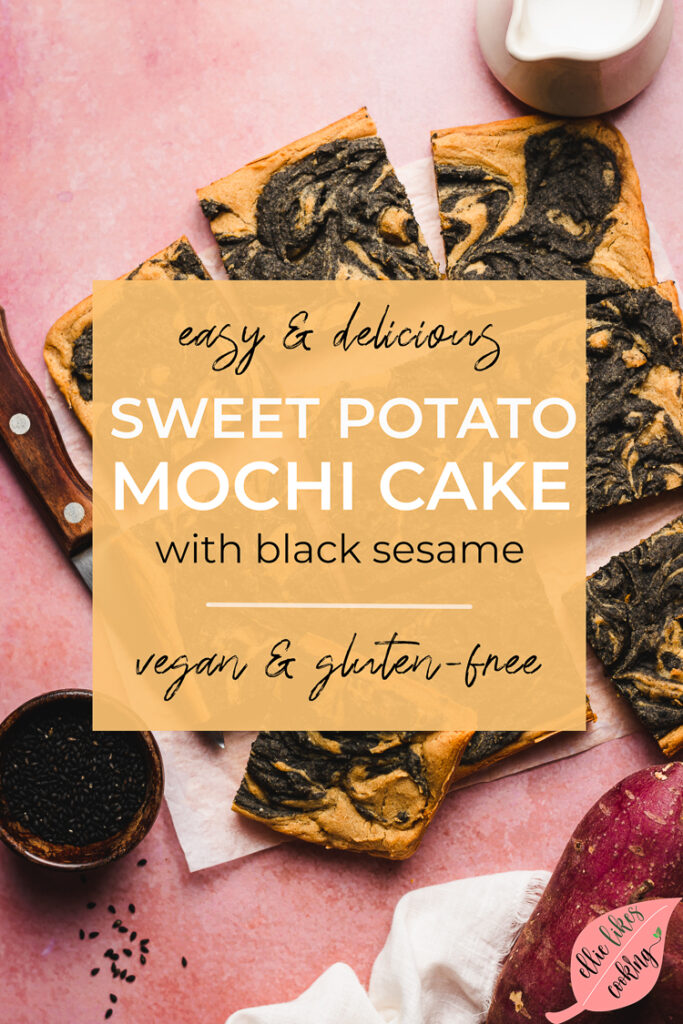
Sweet Potato Mochi Cake (Vegan, Gluten-Free)
This mochi cake is a healthier, vegan twist on Hawaiian butter mochi. Made with sweet potato, coconut milk, and black sesame. No eggs or butter needed!
I’ve been really sad about not being able to travel to Japan this year due to COVID, so I’ve been trying to recreate some of Japan in my kitchen. As a result, I’ve been buying lots of satsumaimo (Japanese sweet potatoes) since it’s one of my favorite foods to get in Japan. During the fall/winter, you can often find yaki imo (roasted satsumaimo) sold at stores, hot and ready to be eaten. I love eating a baked/roasted satsumaimo with dinner or for a midday snack, sometimes with some nut butter or tahini. But I’ve also been baking with it recently and I love the flavor it adds to cakes, cookies, and frostings! I have so many ideas for baking with it, but I’m starting with my current obsession — sweet potato mochi cake. So simple but so good!!

Key Ingredients
- Sweet Potato ⟶ Any variety will work, but Japanese satsumaimo are my favorite! You can bake or steam them, then mash into a puree. You can also use canned puree, but fresh has the best flavor.
- Sugar ⟶ coconut sugar, regular granulated sugar, brown sugar, or a combination
- Sugar Free: In my opinion, monkfruit* is the best tasting sugar alternative, but of course it doesn’t taste 100% like sugar. Sometimes I do half sugar and half monkfruit.
- Full-Fat Coconut milk ⟶ Do not replace with other milks or lite coconut milk! You need all the fat to create a rich mochi cake.
- Mochiko*⟶ Japanese sweet rice flour. I don’t recommend using other types of sweet/glutinous rice flour as they likely won’t be as chewy as mochiko.
- Black Sesame Seeds ⟶ Optional but it pairs wonderfully with Japanese sweet potato! You can grind your own black sesame seeds, buy them pre-ground, or buy black sesame paste (often sold at Asian grocers)
Vegan Mochi Cake Tips
Add plant milk as needed if your sweet potato puree is dry.
Moisture content varies by potato so you may need to add some milk if your batter is dry. You don’t need a very thin batter, but it should fall off a spoon easily. Add milk a tablespoon at a time if needed.
Make sure your batter is smooth.
Mochiko has a tendency to clump together once added to liquid, so make sure you whisk constantly until smooth, or use a sieve to smooth out the clumps. I like to pour my batter through a sieve and use a spatula to press down and smooth out the clumps.
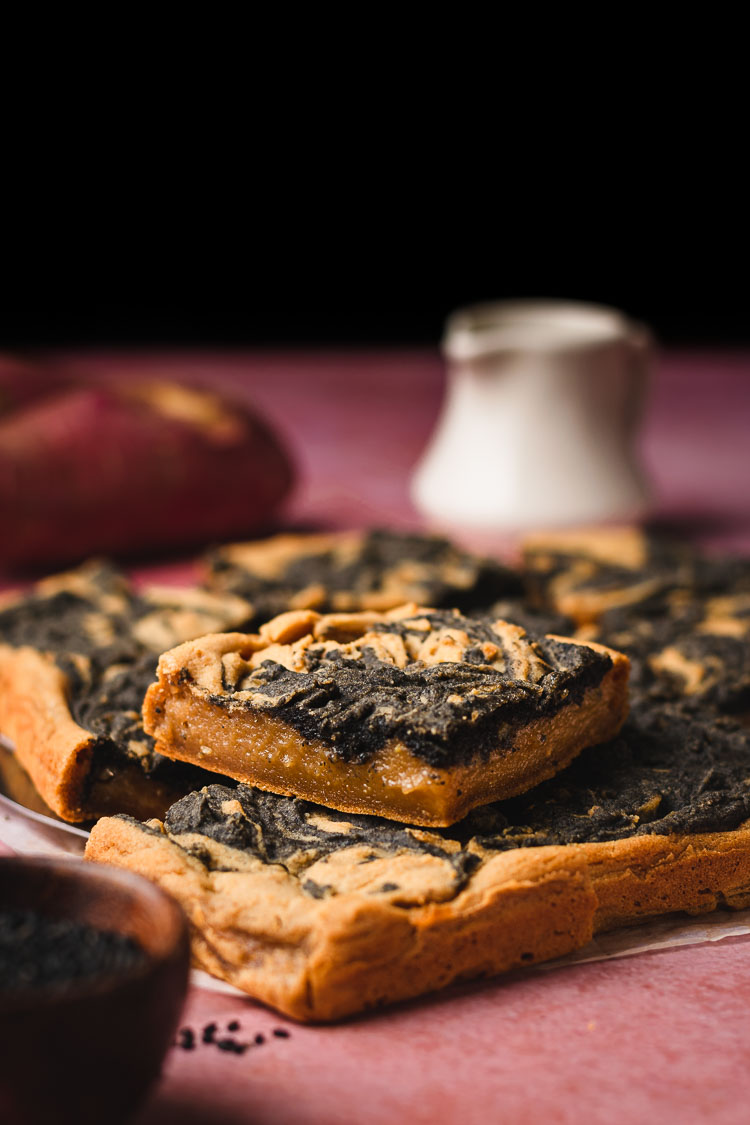
Cool completely before slicing.
As tempting as it is, if you cut into the cake before it’s cooled, you’ll end up with a sticky, gooey mess. The mochi cake will set and firm up as it cools.
Shake the can of coconut milk and do NOT refrigerate.
You want to have one coherent mixture. You do not need to separate the fatty cream from the liquid, you will use all of it.
Mochi Cake FAQ
How do I store mochi cake?
Mochi cake will usually keep at room temperature for up to 3 days. However, if you live in a very moist environment, I recommend refrigerating or freezing after the first day. The mochi cake in my house always gets gobbled up within 2-3 days, so I’ve never tried refrigerating or freezing them. But if you decide to go this route, keep in mind the mochi cake will dry out in the fridge/freezer, so I recommend microwaving, toasting, or baking them to reheat.
How do I know when mochi cake is done cooking?
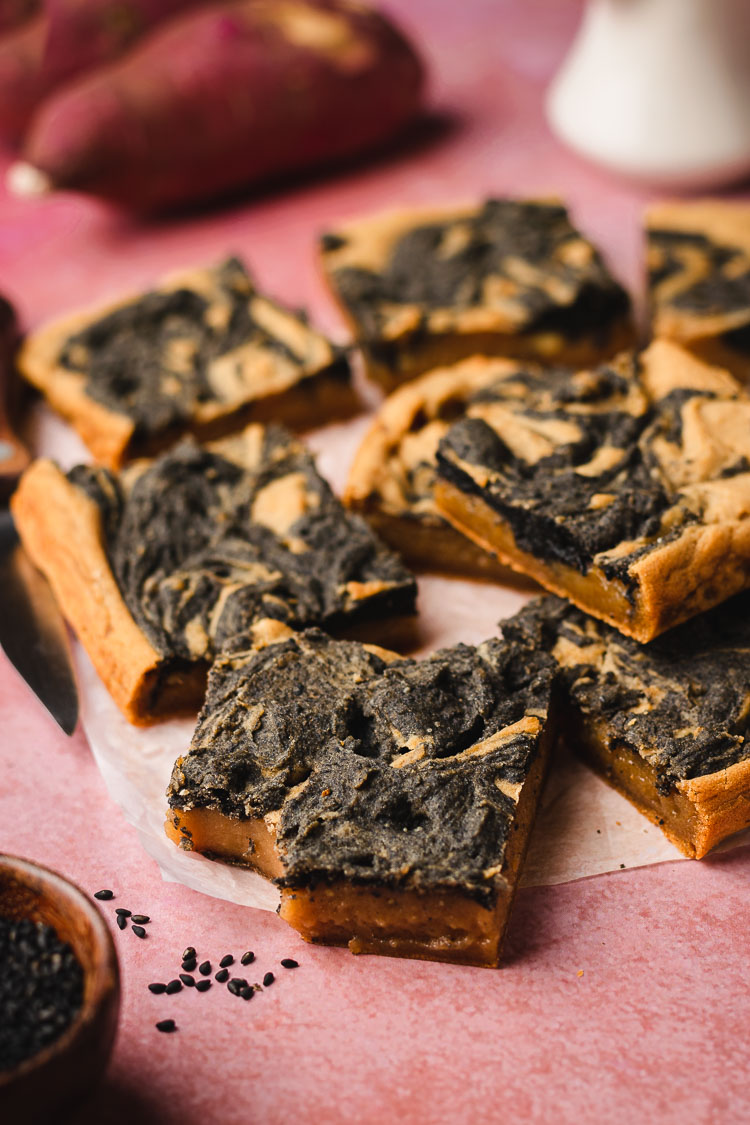
The top should start to crack and the edges should be browned and caramelized. You can also check with a toothpick inserted in the center of the cake — if it comes out mostly clean or with just a few crumbs (but not gooey batter) then it’s done. The texture is of course different from a normal cake, but the inside should be set before you remove it from the oven.
Is this mochi cake gluten-free?
Yes! Despite being called glutinous rice flour (or sweet rice flour/mochiko), there is no gluten in it.
Where can I buy sweet rice flour?
Mochiko can be found at Japanese markets and other Asian markets, or on Amazon*. Other brands of sweet rice flour can be found at Asian markets as well, or check your grocery store’s “Asian Foods” isle if available. Bob’s Red Mill also makes sweet rice flour, though I haven’t tried it yet.
More Delicious Plant-Based Desserts!
- Mochi Cake
- Pumpkin Mochi Cake
- Chewy Chocolate Chip Cookies
- Gluten-Free Snickerdoodles
- Caramel Apple Crumb Cake
- Strawberry Short Cake

I hope I’ve inspired you to make this sweet potato mochi cake with black sesame swirl! If you try it out, don’t forget to tag me in your photos on instagram @ellielikes.cooking, leave a comment/rating down below, and let me know how you liked it! I love seeing all of your tasty recreations 🙂 Happy baking! ♡
Ingredients
- ½ cup (120g) roasted or steamed Japanese sweet potato**1
- 2-4 tbsp non-dairy milk (coconut, soy, oat, etc.)**2
- ½ cup (90g) granulated sugar
- 1 cup + 2 tbsp (270ml) full-fat coconut milk
- ¾ tsp vanilla extract
- 1 ½ cups (240g)
mochiko*/ sweet rice flour - 1 tsp baking powder
Black Sesame Swirl
- 2 tbsp ground black sesame seeds
- 2-4 tbsp coconut or soy milk
Instructions
- Preheat oven to 350°F. Grease an 8×8" baking dish and set aside.
- Combine sweet potato puree, non-dairy milk, sugar, coconut milk, and vanilla in a large bowl.
- Use a sieve to sift in the flour and baking powder, then whisk until smooth.
- Scoop out about ¼ cup of batter and mix with ground black sesame seeds and 2 tbsp plant-based milk. Add extra milk if the batter is too thick to swirl.
- Mochiko has a tendency to clump together, so if your batter has lumps of flour in it, arrange a sieve over your baking dish or a bowl. Pour some batter in the sieve and use a spatula to press the batter down, smoothing out any clumps. Repeat with remaining batter. OR if your batter is fairly smooth, just transfer to the prepared baking dish.
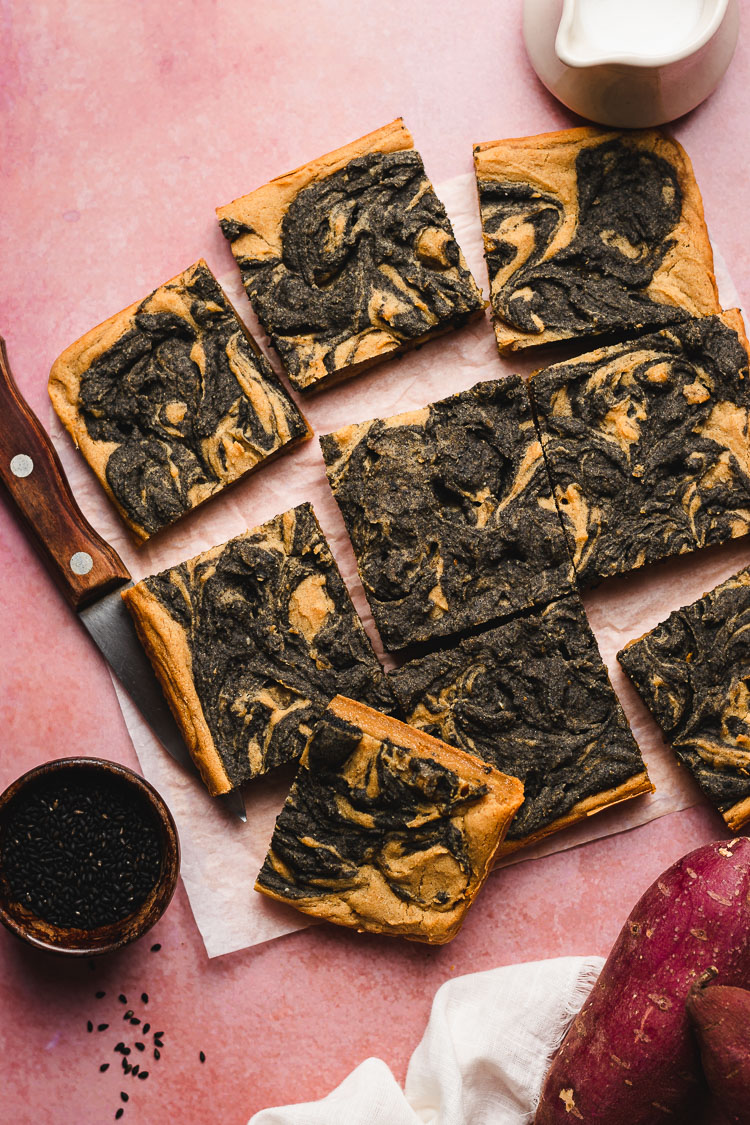
- Dollop the black sesame mixture on top of the batter and use a toothpick or knife to make swirls in the batter.
- Tap the dish on the countertop a few times to release air bubbles from the batter. Bake for 45-60 minutes, until the top begins to crack and the edges are slightly brown.
- Let the mochi cake cool completely to room temperature before slicing. Store leftovers in an airtight container at room temperature for up to 3 days.
Notes

*Disclosure: This page may contain affiliate links. As an Amazon Associate I earn from qualifying purchases, but the price remains the same to you. Thank you for supporting Ellie Likes Cooking!
Save for later!
So delicious and easy to make!!! Love the texture and sweet potato black + sesame flavours.
Thank you for your kind comment Kaelyn! I’m so happy you enjoyed them 🙂 sweet potato and black sesame are the perfect combo!!
Utterly amazing!! This was just what I needed. I swapped the sugar for maple syrup. Thank you for this delicious recipe. I’m now trawling through your website & drooling away!
Thanks so much for your review, Jandi! I’m so happy you enjoyed the mochi cake and I love the idea of using maple syrup, definitely trying that myself next time!
Hi! These look yummy! Do you think I can replace the sweet potato with ube? I have been wanting to make ube or matcha Mochi bars!!
Hi Angelica! Although I’ve never tried it, I think they are similar enough that you can easily replace the sweet potato with ube. You may want to add a little extra coconut milk depending on how dense they are (I’ve never baked with ube before so can’t really say), but if you find your batter is super thick you can add some more liquid 🙂 Let me know how it goes!
You read my mind! I was just about to ask about using satsumaimo since I just bought some. Do you have a recommendation on bake time if I put these into a mini cupcake pan? I was thinking of adding anko filling too. I’ll report back on how it turns out! Thanks for the recipe!
Hi Joyce! I’ve never tried them as cupcakes so I can’t say for sure, but I would start checking them around 20 minutes and just keep baking until the edges are golden and the top is cooked and slightly caramelized. Adding anko to it sounds delicious!! I’m definitely going to try that with my next batch 😋 Can’t wait to hear how they turn out!
I made this for my grandpa’s birthday and it was AMAZING! I baked a satsumaimo and mashed it, but I found that there wasn’t enough moisture and had to add water to the batter until I got the right consistency. Other than that, it still came out very good. Just a tip for WHEN I make it again 🙂 The sweetness level was just perfect for me since I am not a huge sweets person.
Hi J, so happy you were able to share this with your family for your grandpa’s birthday, that makes me so happy! ☺️ Satsumaimo can definitely vary in moisture — I added a note about adding milk/water if needed. Hope that helps for next time! Thank you for the great review 🙂
Foolproof, easy recipe and such an incredible result! I absolutely loved making this, I also want to try replacing the sweet potato with ube next time. I doubled the recipe and it came out perfect. Thank you!
Hi Sarah, so happy you enjoyed the mochi cake! I think it would be delicious with ube as well, and such a pretty color! Thanks for the lovely review 🙂
This sounds wonderful! Can you also post a vegan oil free Mochi cake recipe with red beans too? And maybe a mocha mochi cake recipe? Since I went WFPB no oil, I thought mochi cake was taboo forever!
Ah red bean mochi cake would be so good! Maybe with matcha? 🤔 And mocha chip…mm I will get right on it!!
If you don’t want to use sesame, do you need something instead or just skip all the swirl ingredients?
You can just omit the swirl 🙂
Oh my goodness I am SO excited to try this. I cannot tell you how up my alley this is in so many different ways.
I’m curious if you can tell me a little bit about the difference in flavor/end result in this one compared to the “regular“ mochi cake recipe you have?
Also, can any/all of your mochi cake recipes be made into mochi muffins just by decreasing bake time?
Thank you!
Hi! This one has a slight sweet potato flavor (not overpowering) and of course black sesame if you use it. My regular mochi cake has more of a buttery sweet vanilla flavor. The sweet potato mochi cake is also a bit thicker, whereas the regular mochi cake is more gooey. I haven’t tried them as mochi muffins before, but I don’t see why it wouldn’t work! Please do report back if you make them as muffins, am curious to try myself next time too. Enjoy!!
Thank you for the reply! I’m planing to make one them for thanksgiving and haven’t decided which one yet. I LOVE satsumaimo (one of my favorite foods! As is sesame! …except I’m very sadly now allergic to the latter. (But not severely and I can eat it in small amounts here and there)). But then of course it will be for people besides just myself and I keep going back and forth on which one to do (and also cake vs muffins)! I do wonder if the lack of eggs would result in a bit of a disappointedly flat muffin… Anyway, I’m just musing “out loud” here. I have a feeling I can’t go wrong whichever I choose:)
I’ll try to remember to update once I make it!
Ooh personally I would go with the satsumaimo version since it seems like more of a “fall dessert” (you can totally leave out the sesame swirl). The muffins would probably come out a bit flat but that would also give a nice dense, chewy texture if that’s what you like. It would also result in more crispy edges! Just be sure to grease your pan well. Now I think I might have to make some for thanksgiving too!