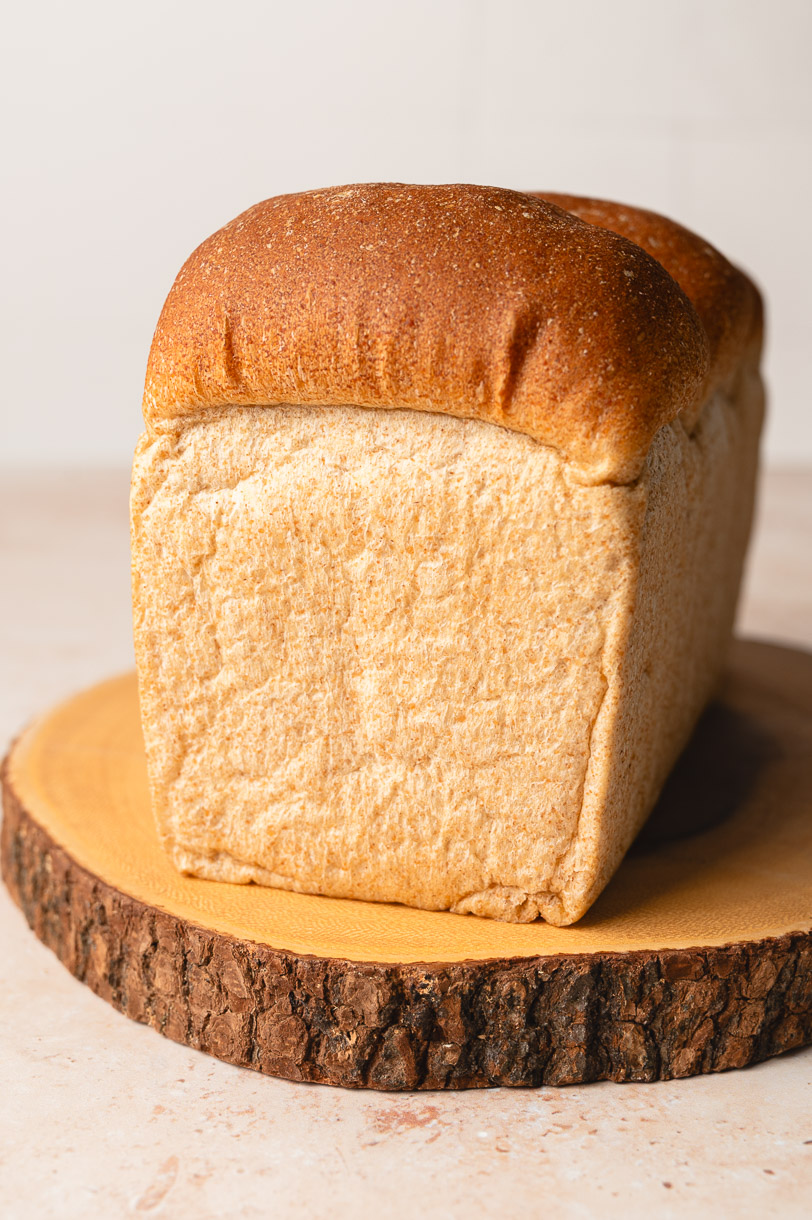
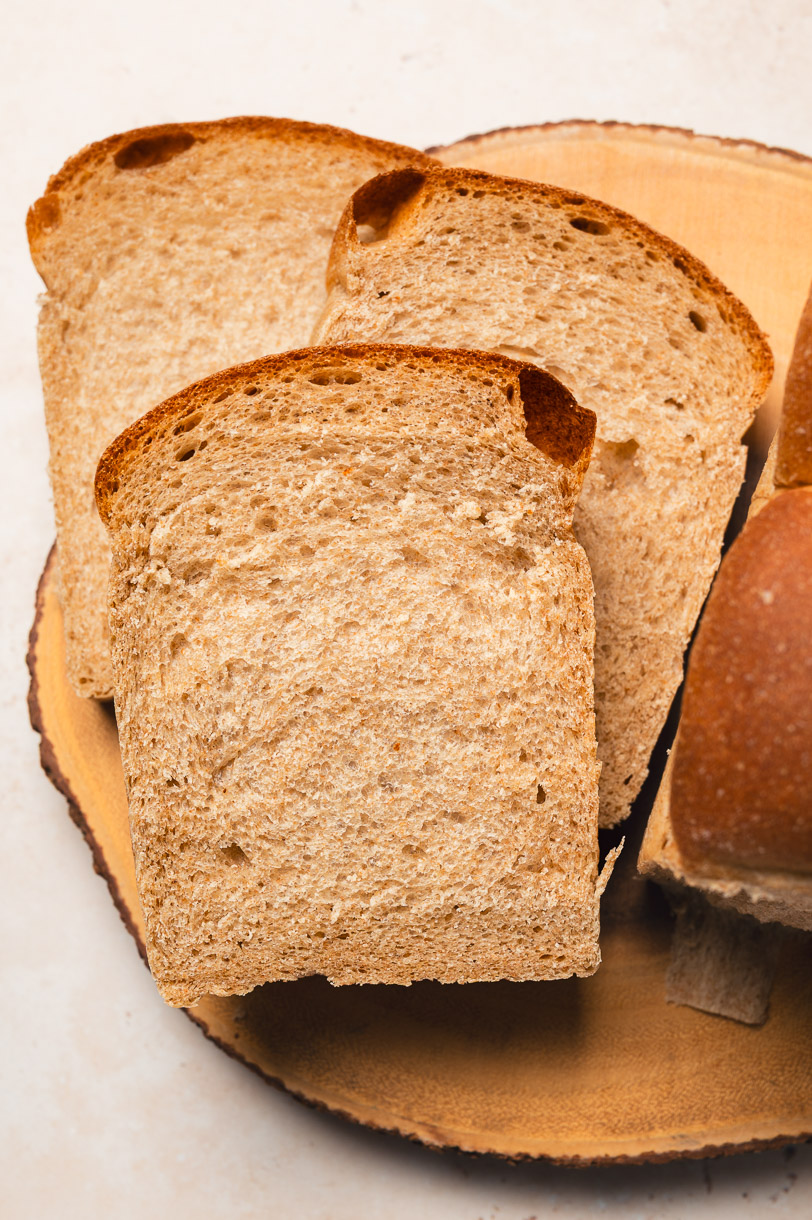
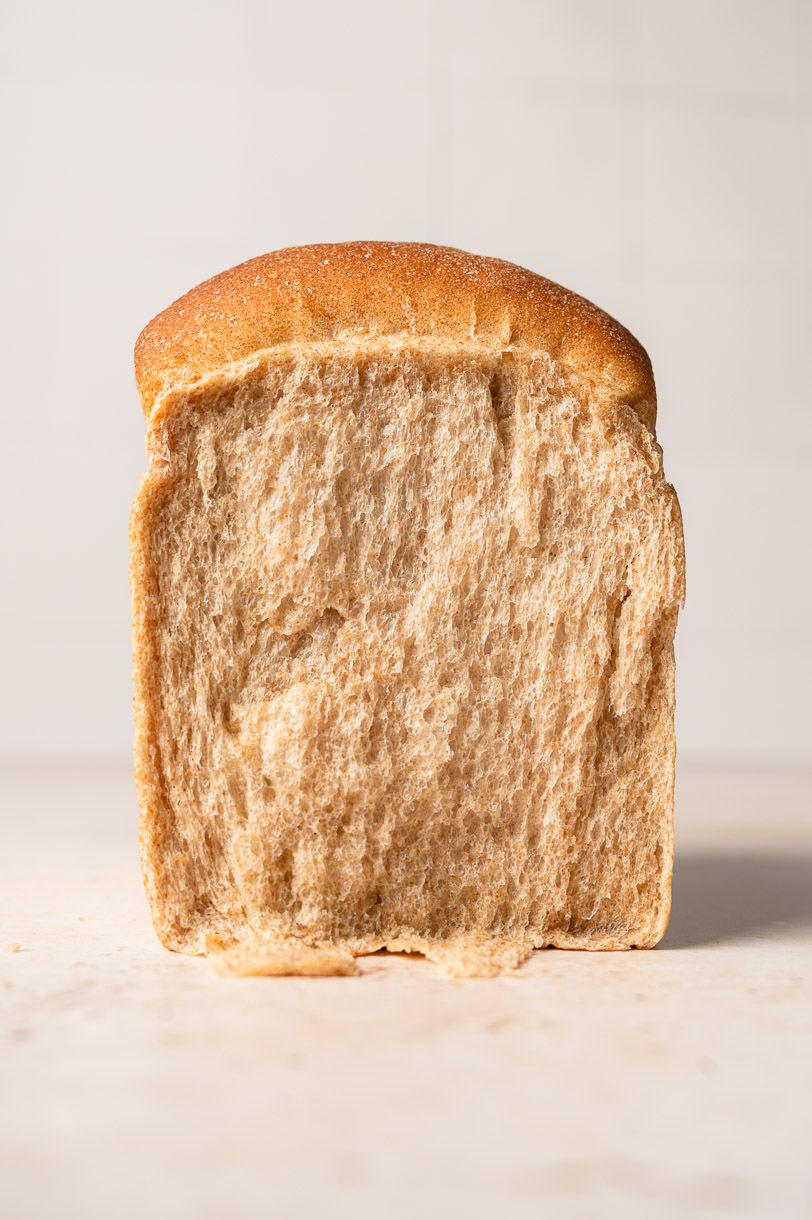
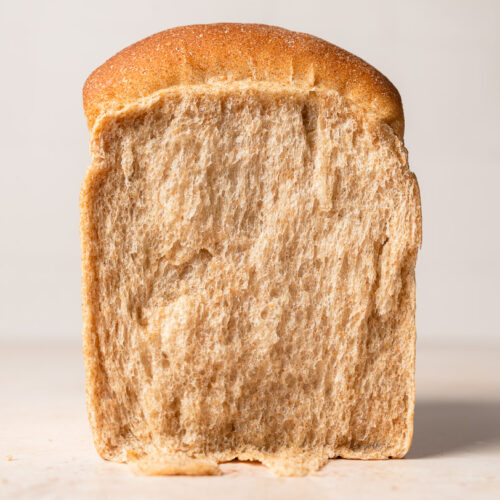
Vegan Whole Wheat Milk Bread (Shokupan)
Learn how to make tall, soft, and fluffy vegan Japanese milk bread with whole wheat flour! No eggs or dairy needed.

Why We Love This Whole Wheat Milk Bread
- Extra Soft and Fluffy: Despite being made with 50% whole wheat flour, this milk bread is so soft, fluffy, and light – thanks in huge part to using a poolish (read more below if you don’t know what that is).
- Simple but Flavorful: This is a simple bread made with just 8 basic ingredients, but it’s surprisingly flavorful! You can enjoy it plain, toasted, or with a pat of butter if you like.
- No Eggs or Dairy: Traditional Japanese milk bread (called shokupan) contains dairy, usually in the form of skim milk powder and butter. Some recipes also use an egg wash on top. But my recipe is all plant-based, using soy milk and vegan butter!
What is a Poolish?
A poolish is a type of pre-ferment (which is a portion of dough fermented ahead of time before being added to the main dough) usually made with equal parts flour, water, and a small amount of yeast. This mixture is then left to ferment overnight, during which time it will produce acids and other compounds that will make your final dough more flavorful and complex. It also adds more structure to your final dough, reducing the amount of kneading you will need to do – particularly helpful in this whole wheat milk bread since whole wheat flour doesn’t contain as much gluten as bread flour.
For this recipe, I opted to make the poolish with 50% of the total flour, which is all of the whole wheat flour. Whole grain doughs in particular benefit from a long rest to make them more flavorful, softer, and easier to work with. However, I’m still new to preferments, so my methods may change in the future. But for now, I’ve been loving making this whole wheat milk bread with a poolish since it makes the final bread so much softer, fluffier, lighter, and more flavorful than the straight dough method. If you want to learn more about preferments, check out this post by Wordloaf!

Tips for Success
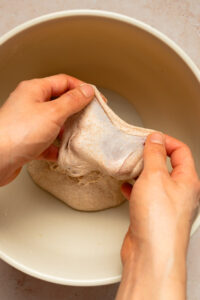
Use the windowpane test ⟶ Take a small section of the dough and gently stretch it into a square, pulling at the four corners. You should be able to stretch the dough out into a very thin membrane that light can pass through. If the dough tears easily, it needs to be kneaded longer. If you stop kneading before your dough passes the windowpane test, it will rip more easily and the resulting bread won’t be as soft and pillowy. Tip: If you’re having trouble getting the dough sufficiently kneaded, let it rest for 10 minutes to relax the gluten.
Proof in a warm area ⟶ Generally, a temperature between 75°F-80°F (24°C-27°C) is ideal for proofing yeast doughs. In the summer, I just let the dough proof on my kitchen counter. But for colder days, I like to place the bowl in my oven and put a pot of boiling water on the bottom of the oven. Keep the oven door closed so the heat doesn’t escape. The moisture from the boiling water will also prevent the dough from drying out.
Drop pan on counter after removing it from the oven ⟶ Once the bread is baked, remove it from the oven and drop the pan on a towel on the countertop a couple times. This allows water vapor to escape which will help prevent the bread from shrinking.
Cool before slicing ⟶ I know it’s tempting to cut into it right after you take it out of the oven, but patience is key to a good bread! If you cut into it too early, your bread can lose a lot of moisture and may shrink.
Transfer to wire rack immediately ⟶ Don’t leave the bread in the pan after baking or moisture will pool on the bottom and sides and make your bread soggy. Immediately take it out of the pan (it should come out easily if you thoroughly greased your pan) and place on a wire rack to cool.
Vegan Whole Wheat Milk Bread FAQ
More Vegan Yeast Breads
- Cinnamon Raisin Milk Bread
- Chocolate Marble Milk Bread
- Melon Pan
- Anpan (Red Bean Bun)
- Seeded Multigrain Bread (No Knead)
- Pumpkin Dinner Rolls
If you try out this recipe, don’t forget to leave a comment/rating down below and tag me in your photos on instagram @ellielikes.cooking. I love seeing all of your tasty recreations!
Whole Wheat Milk Bread (Shokupan)
Ingredients
Poolish
- 120 grams (1 cup) whole wheat flour
- ¼ tsp instant yeast
- 120 grams water
Dough
- 50-60 grams soy milk1
- 18 grams (1½ tbsp) granulated sugar
- ¼-¾ tsp instant yeast2
- 120 grams (1 cup) bread flour
- 3 grams (½ tsp) salt reduce by ⅛ tsp if using salted butter
- 5 grams (1½ tsp) vital wheat gluten3 optional
- 13 grams (1 tbsp) unsalted vegan butter cut into small cubes
Instructions
- Poolish: Mix whole wheat flour, yeast, and water together in a large bowl. Cover and rise at room temperature for 1 hour, then transfer to the fridge overnight. The next morning, take it out of the fridge and let it sit at room temperature until doubled in size and bubbly (about an hour).120 grams (1 cup) whole wheat flour, ¼ tsp instant yeast, 120 grams water
Kneading
- Combine: To the bowl of your stand mixer, add soy milk, sugar, yeast, bread flour, salt, vital wheat gluten (if using) and the poolish. Attach a dough hook to your stand mixer. Turn it on at low speed (1-3) to combine the ingredients, then gradually increase speed to medium (4-5) as the dough comes together. Knead on medium for about 5 minutes. The dough should come together into a ball and loose some of its stickiness. Turn off the stand mixer, cover with a towel, and let the dough rest for 5-10 minutes.50-60 grams soy milk1, 18 grams (1½ tbsp) granulated sugar, ¼-¾ tsp instant yeast2, 120 grams (1 cup) bread flour, 3 grams (½ tsp) salt, 5 grams (1½ tsp) vital wheat gluten3
- Rough windowpane: Turn the mixer back on to medium speed and knead another 5 minutes or so until the dough is smooth and forms a rough windowpane4 (i.e. you should be able to stretch it out fairly thin before it breaks, but maybe not enough for light to pass through yet). Cover and rest again for 10 minutes.
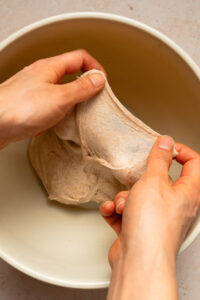
- Windowpane: Turn the mixer back on at low speed and gradually add in the butter cubes. Increase the speed to medium as the butter gets incorporated into the dough. Continue kneading on medium speed for 5-10 minutes until the dough reaches the windowpane stage. You can stop to scrape down the dough every couple minutes if needed. If your mixer gets too hot, turn if off, cover the dough, and let it rest for 5-10 minutes.13 grams (1 tbsp) unsalted vegan butter
First Proof
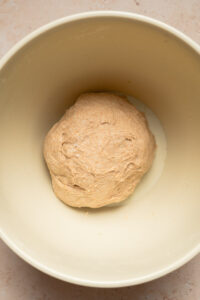
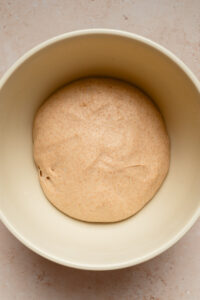
- Shape the dough into a ball and place in a lightly greased large bowl. Cover with a kitchen towel or plastic wrap and set on the counter to rise for 1-3 hours until doubled in size. You can also use the "proof" setting if your oven has one to speed up the proofing time.
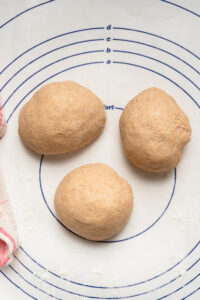
- Deflate and divide: Press down on the dough to deflate it and transfer to a lightly floured work surface. Divide the dough into three equal pieces (about 150 grams each). Gently roll each piece into a ball and cover with a kitchen towel. Rest for 10-15 minutes.
- Grease pan: Meanwhile, melt about 2 tsp of vegan butter. Use a pastry brush to brush the butter all over the bottom and sides of your loaf pan (and the lid if you are making a flat-topped loaf). You can also use oil if you prefer.
Shape Dough
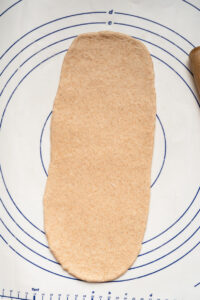
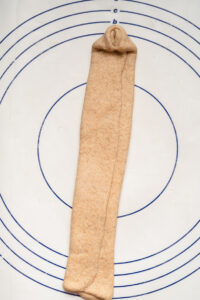
- Lightly flour your work surface. Take one dough ball and roll it out into a vertical rectangle.
- Fold the sides into thirds, overlapping a bit (about 1cm) in the center.
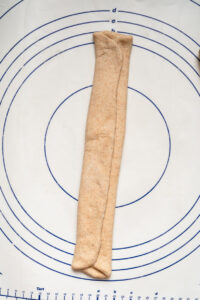
- Gently roll out with your rolling pin to seal the seam.
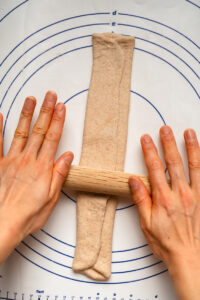
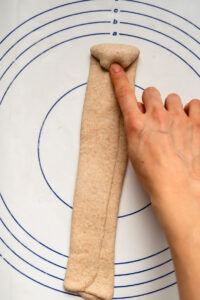
- Fold the two top corners in to the center of the rectangle.
- Tuck the tip down to the center.
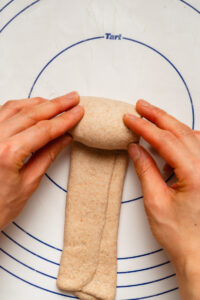
- Roll the dough towards you and try to keep the shape even.
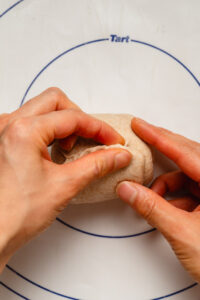
- Pinch the edge to seal the seam.
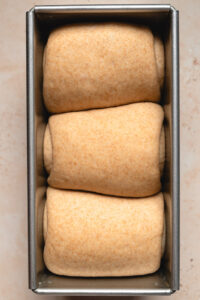
- Place seam-side down in your greased pan. Cover with a towel and repeat with the remaining dough balls.
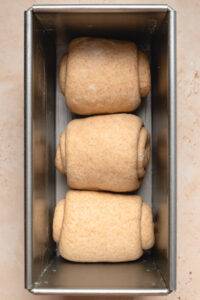
Second Proof
- Cover the pan with a kitchen towel or plastic wrap and place in a warm area to rise for 1-2 hours. The dough should rise to about 80-90% of the height of the pan.
- If your oven takes a while to preheat, start preheating your oven to 425°F/220°C when the dough is a little over halfway risen.
Bake
- Uncover the pan and place onto the middle rack of your oven. Drop the oven temperature to 385°F/195°C. Bake for 30-40 minutes until the internal temperature reaches 195°F/90°C. It should be nicely browned on the outside and spring back when you push on it. Tent with foil if the top is browning too quickly (check after 15 minutes).
Cool
- Place a folded towel on your countertop and drop the pan onto the towel a couple times to let water vapor escape (this helps prevent the bread from shrinking).
- Turn the pan on its side and give it a few thrusts to slide the bread out onto a cooling rack.
- Let the bread cool completely before slicing so the structure can set. If you cut into the bread too soon, it may shrink and lose moisture.
Notes

*Disclosure: This page may contain affiliate links. As an Amazon Associate I earn from qualifying purchases, but the price remains the same to you. Thank you for supporting Ellie Likes Cooking!
Save for later!