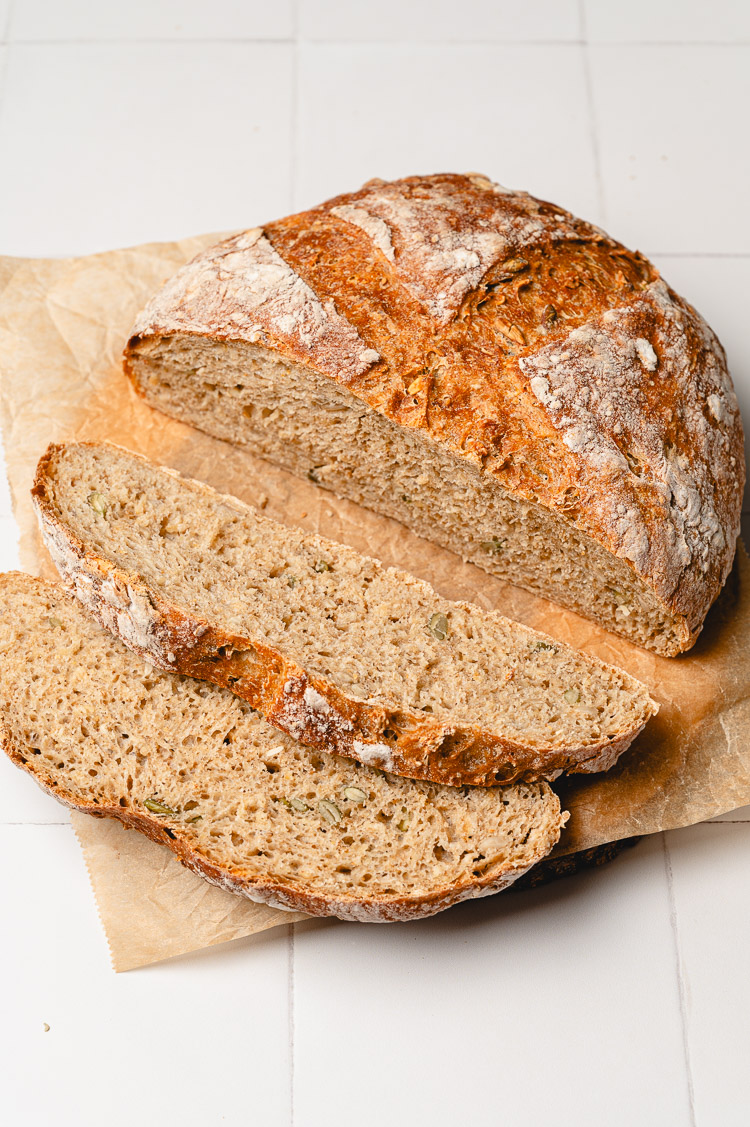
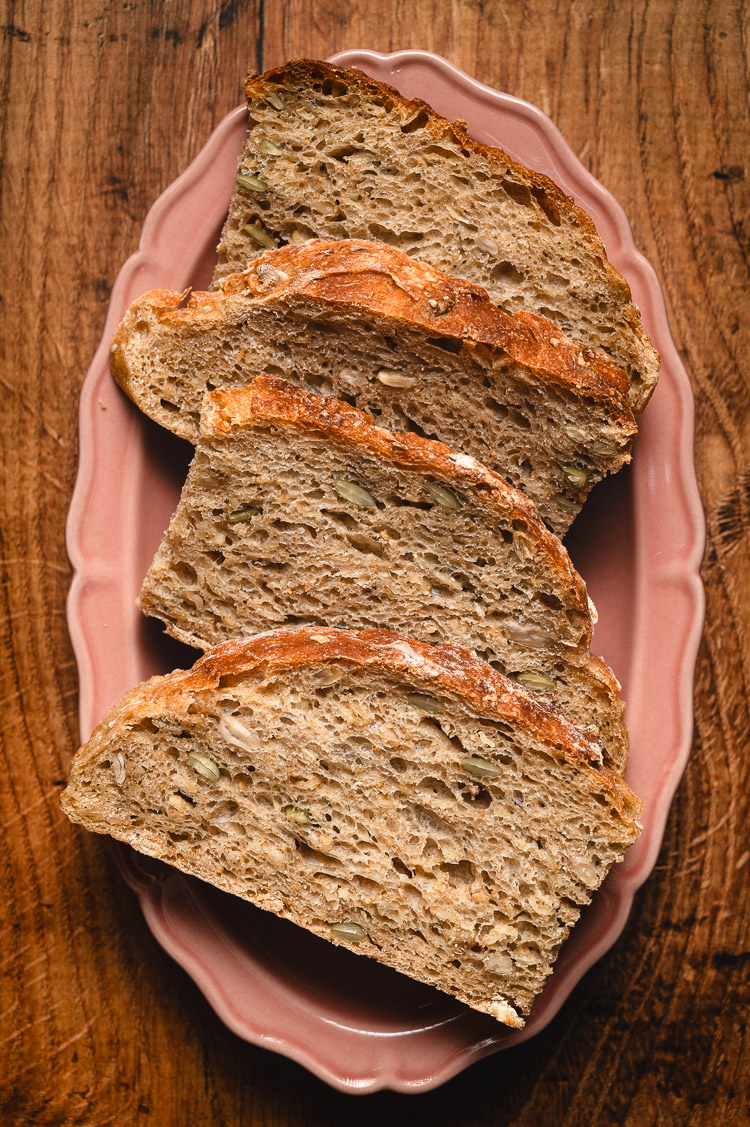
Seeded Multigrain Bread (No Knead)
This no-knead multigrain bread is delicious and so easy to make! Packed with heart-healthy seeds and fiber-rich whole wheat flour and oats.
If you haven’t tried making no-knead bread yet, this is your sign to! It does take time, so prep in advance, but the hands-on time is very little and super easy to do. Anyone can make no-knead bread! Basic no-knead bread is made with just flour, yeast, salt, and water. But this multigrain bread is extra nutritious (and delicious) thanks to the inclusion of whole wheat flour, oats, and seeds!
Key Ingredients
- Bread Flour ⟶ Bread flour produces a strong, chewy bread thanks to the extra gluten in it, as opposed to all purpose flour. You can use all purpose flour if it’s all you have, but I highly recommend bread flour for the best result.
- Whole Wheat Flour ⟶ I love baking with whole wheat flour so of course had to include some in this bread! But just a bit, since we’re also adding oats and seeds – bread flour is the base of this bread so it still comes out soft and fluffy.
- Rolled Oats ⟶ Makes the bread heartier and gives it a soft, chewy texture.
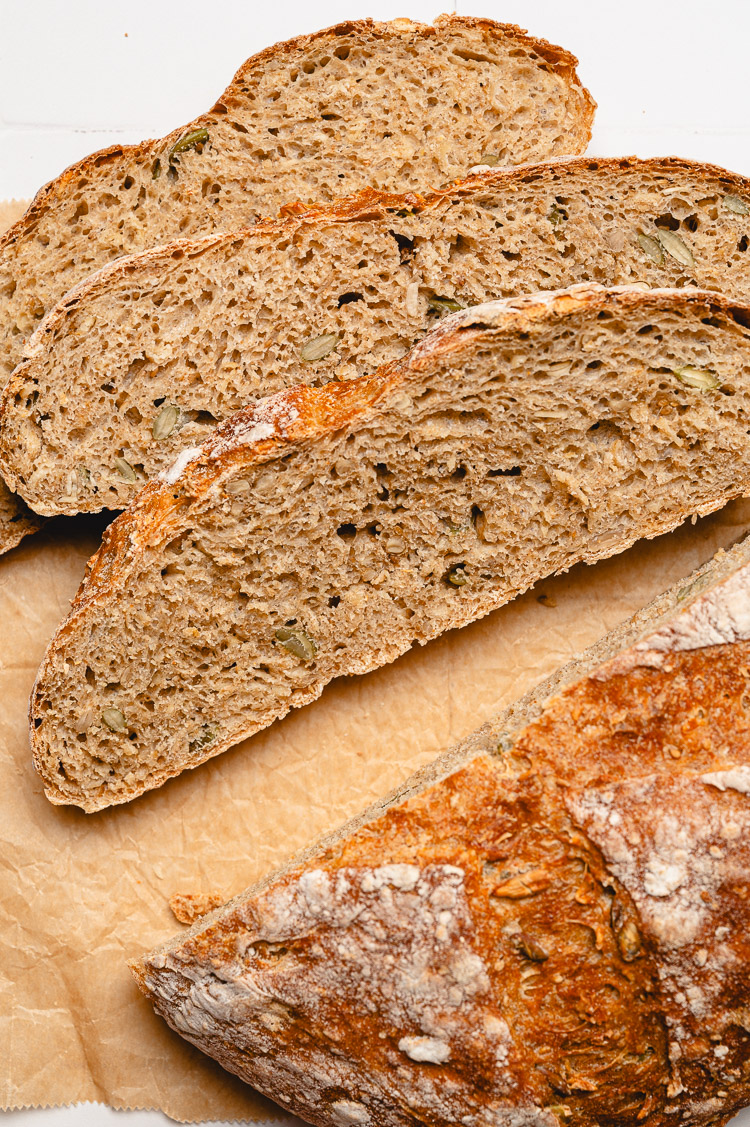
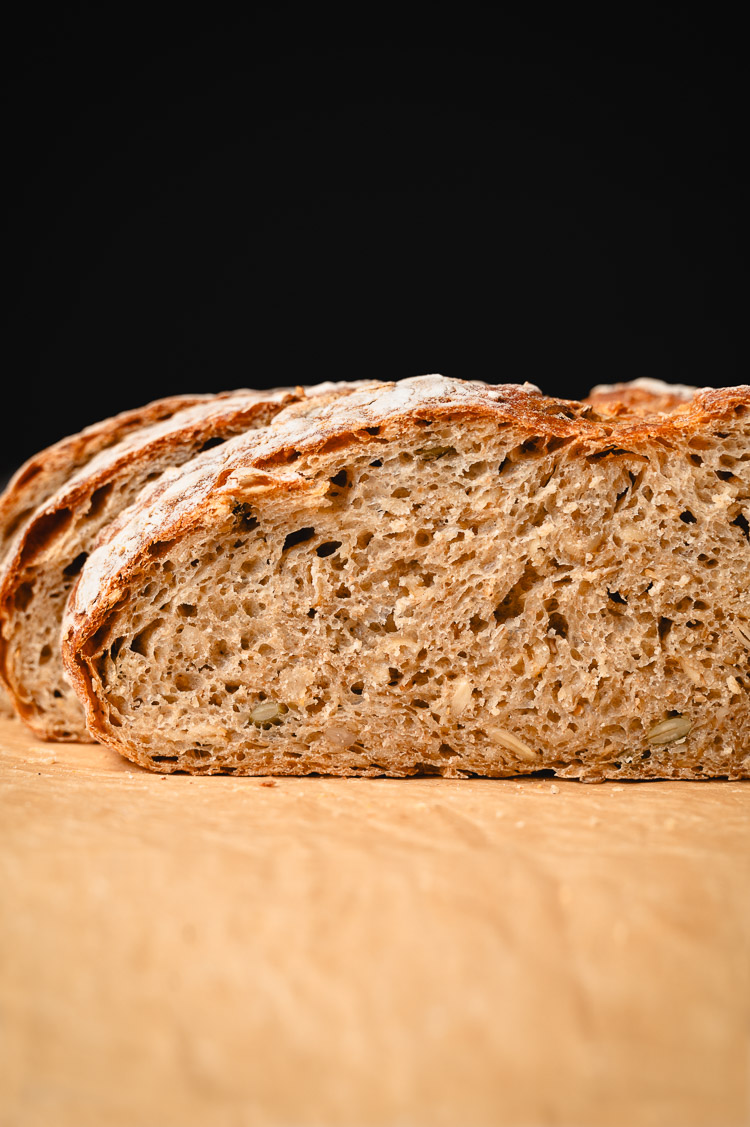
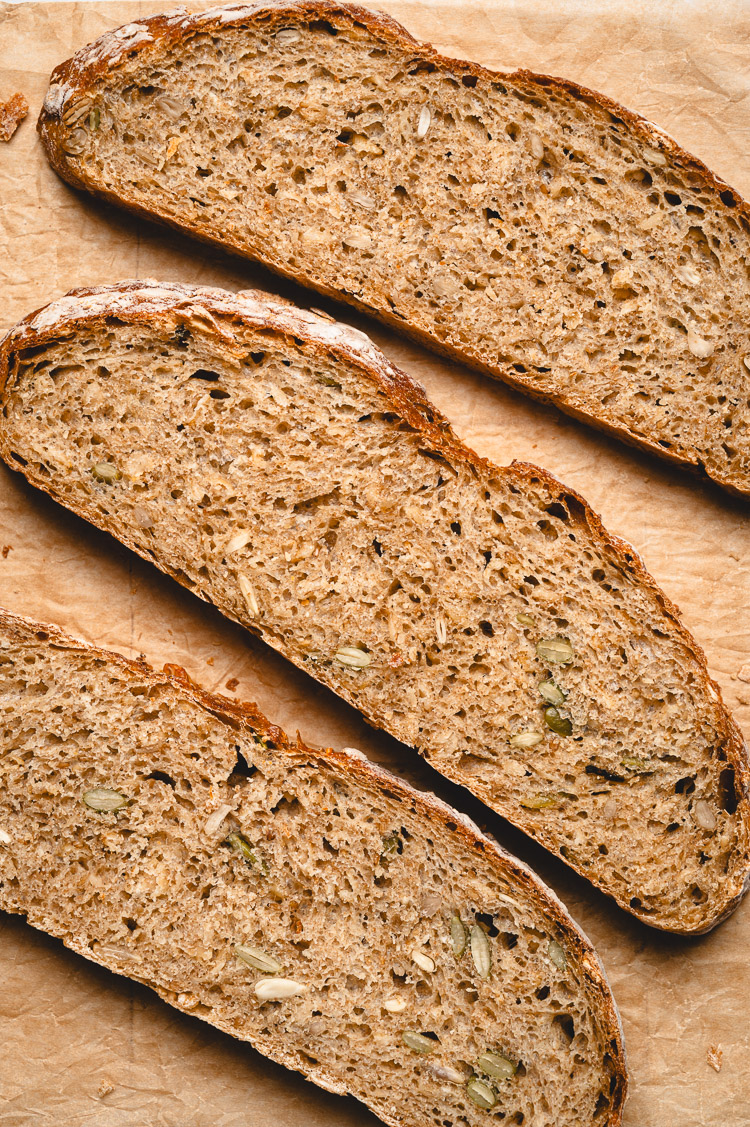
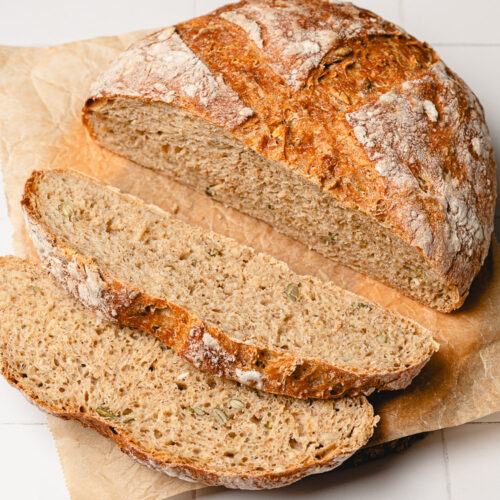
- Seeds ⟶ Feel free to use any seeds you like. For the bread in the photos, I used pumpkin seeds, sunflower seeds, and sesame seeds.
- Yeast ⟶ I use instant yeast, but active dry yeast can be used as well – the rise time may just take a bit longer.
- Salt & Sugar ⟶ For flavor but also to manage yeast activity. Sugar feeds the yeast while salt inhibits yeast activity, slowing down the rise which helps develop more flavor.
How to Make No Knead Bread
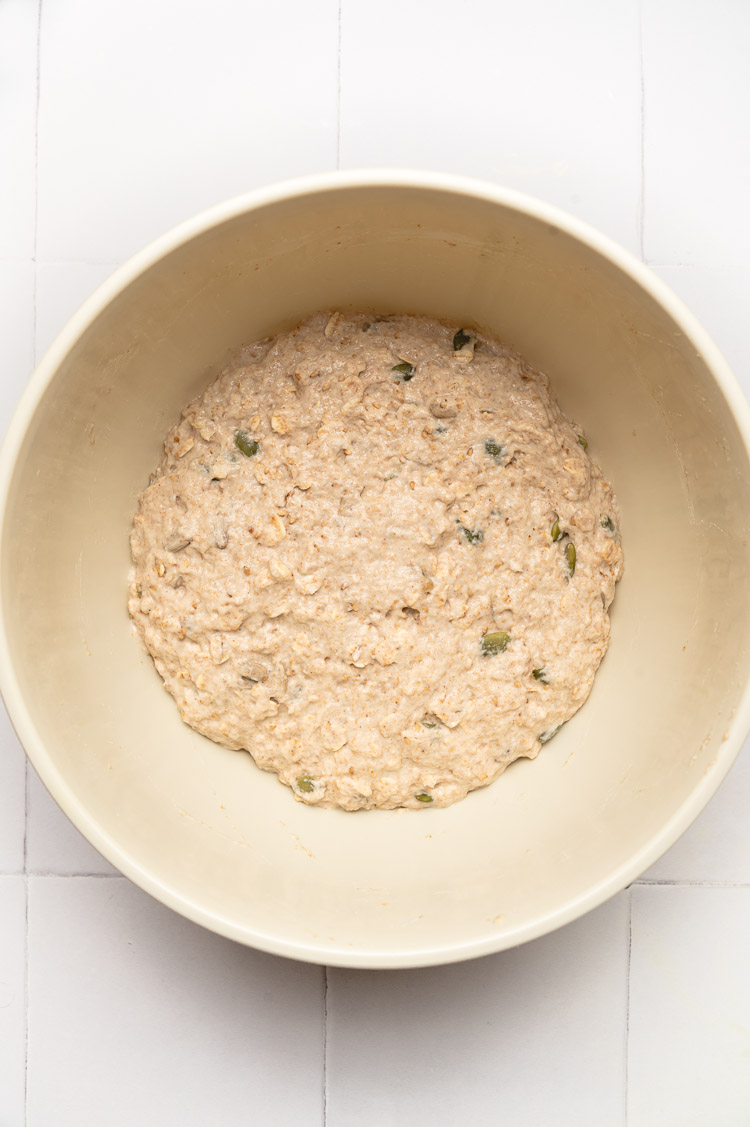
No knead bread is the easiest bread to make. Just mix everything together, let it rest overnight, shape, and bake! The hardest part is letting it rise, but this is crucial for developing good flavor. And don’t be too fussy when it comes to shaping the dough, it doesn’t need to be a perfect round. The dough is very sticky and hard to work with, so I recommend using a bench scraper or even a large rubber spatula if you have one. Otherwise, be sure to generously flour your hands and work surface.
No Knead Multigrain Bread FAQ
Why bake bread in a dutch oven?
A dutch oven is used to create steam while the bread bakes, resulting in a crispy, chewy crust with nice browning. It also helps the dough expand during baking since the crust stays pliable rather than hardening right away.
How do I bake bread without a dutch oven?
If you don’t have a dutch oven, no worries! You can use a large pot with a lid or place a baking sheet on top as a lid. Or, you can create steam by pouring boiling water into a baking tray below the dough, and bake the bread on a baking sheet.
Why is the rise time so long?
Longer rise time means more time for the yeast to ferment and develop complex flavors. As the dough rests, starches in the dough break down into simple sugars which feed the yeast. The yeast in turn produces organic acids and CO2, which contribute lots of flavor and help the dough rise, respectively. Bread is so much more flavorful after a long cold ferment!
Can I use all bread flour?
You can replace the whole wheat flour with more bread flour and reduce the water by 30 ml, since whole wheat flour is more absorbent than bread flour. If you want to omit the oats, I’m not sure how much water you’ll need to reduce, but I would start with around 325ml. Dough should be wet and sticky but hold a ball shape.
Baking Tips
Double the salt if you like salty bread ⟶ I cut back on the salt in this bread for those watching their sodium intake, but typical artisan bread will use 2 or even 3 times as much salt. Do note that salt inhibits yeast activity, so increasing the salt may increase your rise time.
Customize the flavors ⟶ For savory breads, you can add minced garlic (or roasted garlic!), fresh or dried herbs, Parmesan, freshly-cracked black pepper, or your favorite seasoning blends.
For a sweet version, try adding chopped dried fruit (raisins, cranberries, dates, cherries, blueberries) or chocolate chunks/chips!
You can also mix and match the seeds with other nuts or seeds like walnuts, pecans, pistachios, almonds, flax seeds, chia seeds, etc.
What to Serve with Multigrain Bread
This bread is delicious served with hearty soups and stews:
- Red Lentil Kabocha Soup
- Leek and White Bean Stew
- Cheesy Broccoli Soup
- Curried Split Pea Soup
- Soy Milk Cream Stew
Chili:
For breakfast with:
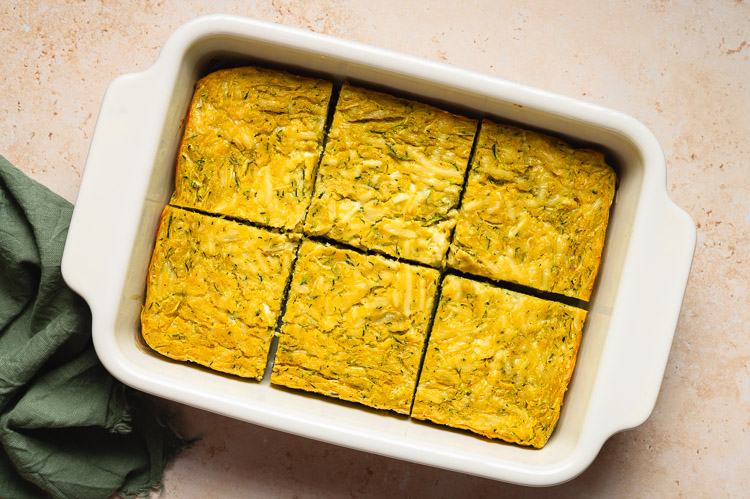
- Vegan Frittata
- Miso Baked Beans
- Avocado Toast
- Peanut Butter Toast
- Protein Smoothie
Or use for sandwiches or serve on the side with salads for lunch. So many possibilities!
If you make this seeded multigrain bread, don’t forget to leave a comment/rating down below and tag me in your photos on instagram @ellielikes.cooking. I love seeing all of your tasty recreations!
Seeded Multigrain Bread (No Knead)
Ingredients
- 240 grams (2 cups) bread flour
- 120 grams (1 cup) whole wheat flour
- 80 grams (1 cup) rolled oats
- 24 grams (2 tbsp) brown sugar
- 5-10 grams (¾-1½ tsp) salt1
- ½-1 tsp
instant yeast*2 - 3 tbsp pumpkin seeds
- 3 tbsp sunflower seeds
- 2 tbsp sesame seeds
- 370 ml water
Instructions
- Prep dough: In a large mixing bowl, whisk together bread flour, whole wheat flour, oats, brown sugar, salt, and yeast. Mix in seeds. Pour in water and stir with a large mixing spoon or spatula until a thick dough forms. Tip: Make sure your mixing bowl is large enough to account for the dough doubling in size.
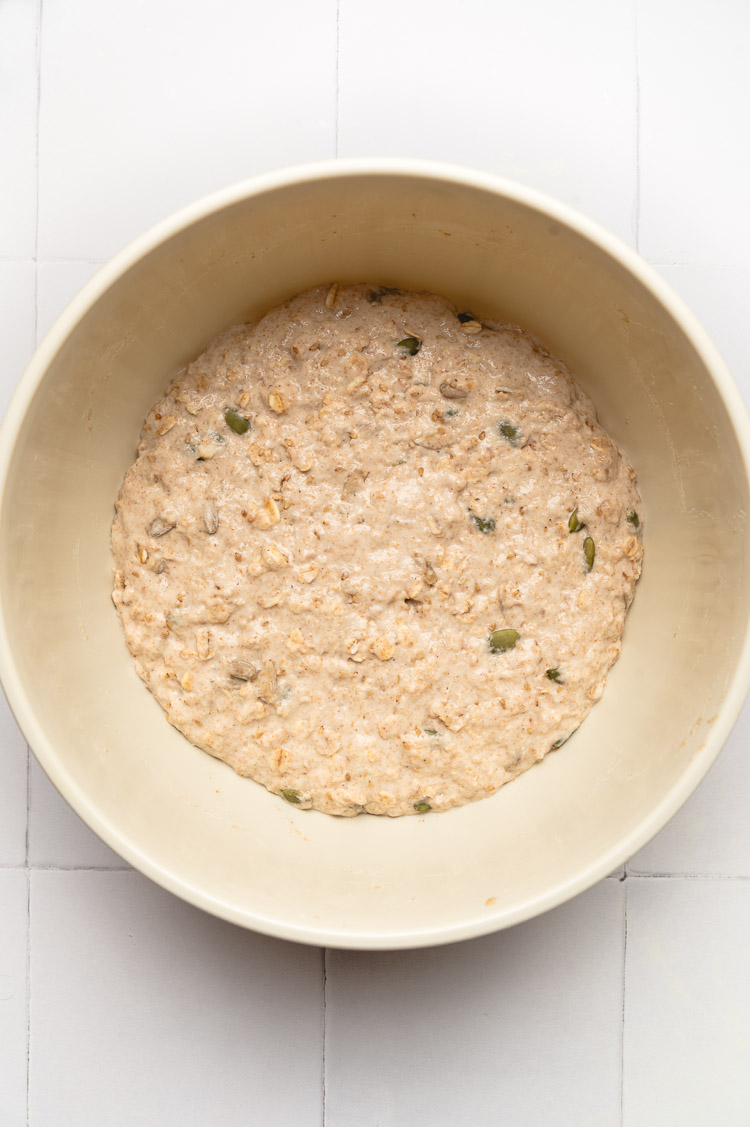
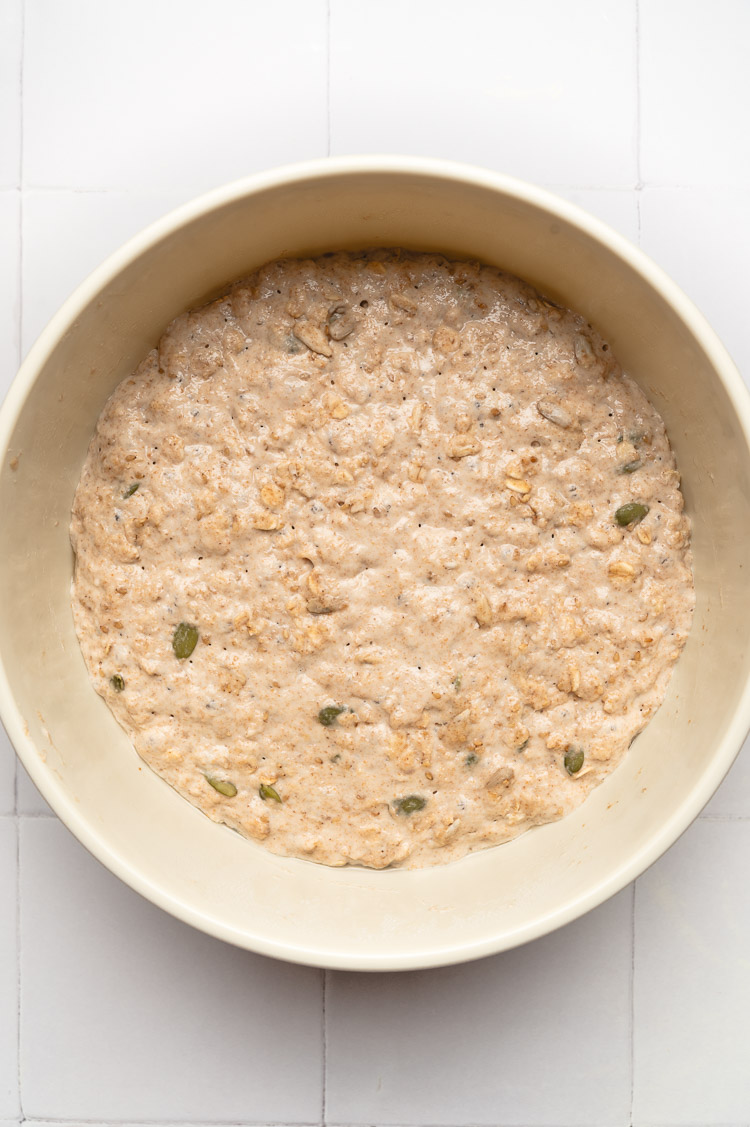
- 1st Rise2: Cover the mixing bowl and leave on the counter for 1½ hours to start the rise, then transfer to the fridge for 12-18 hours. The dough should be loose, doubled in size, and have lots of air bubbles. (Make sure your bowl is large enough to allow the dough to double in size.)Tip: If you would like to do the first rise at room temperature, it will take about 6-8 hours.
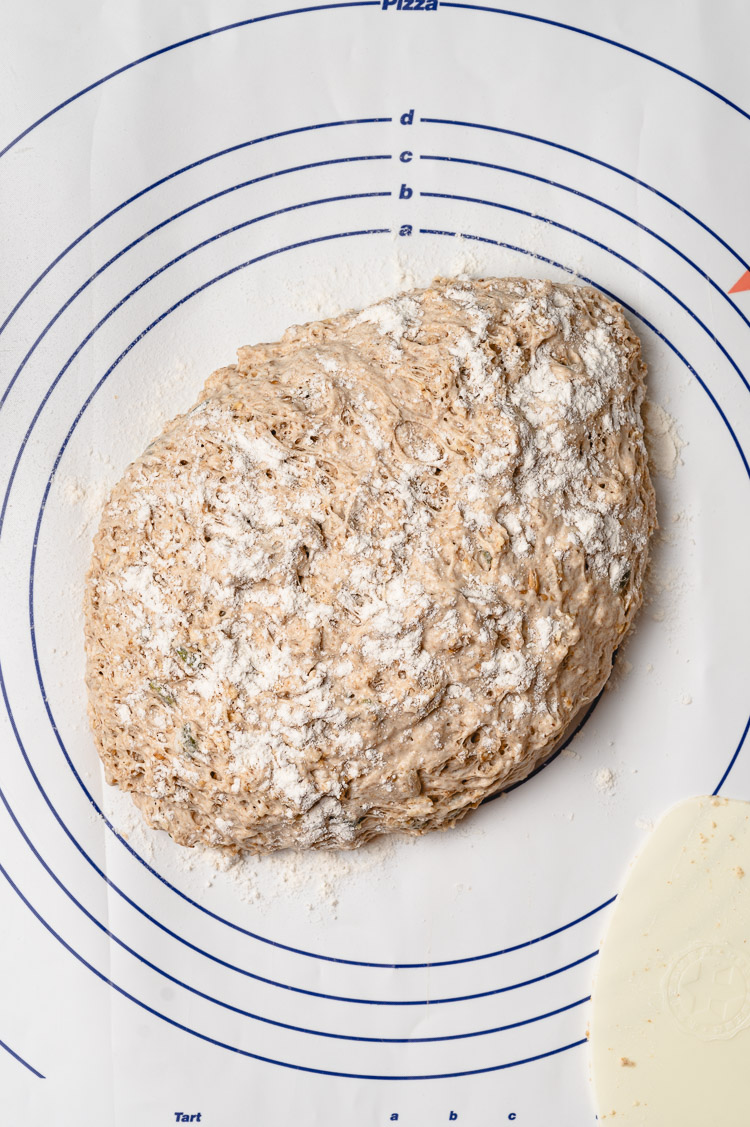
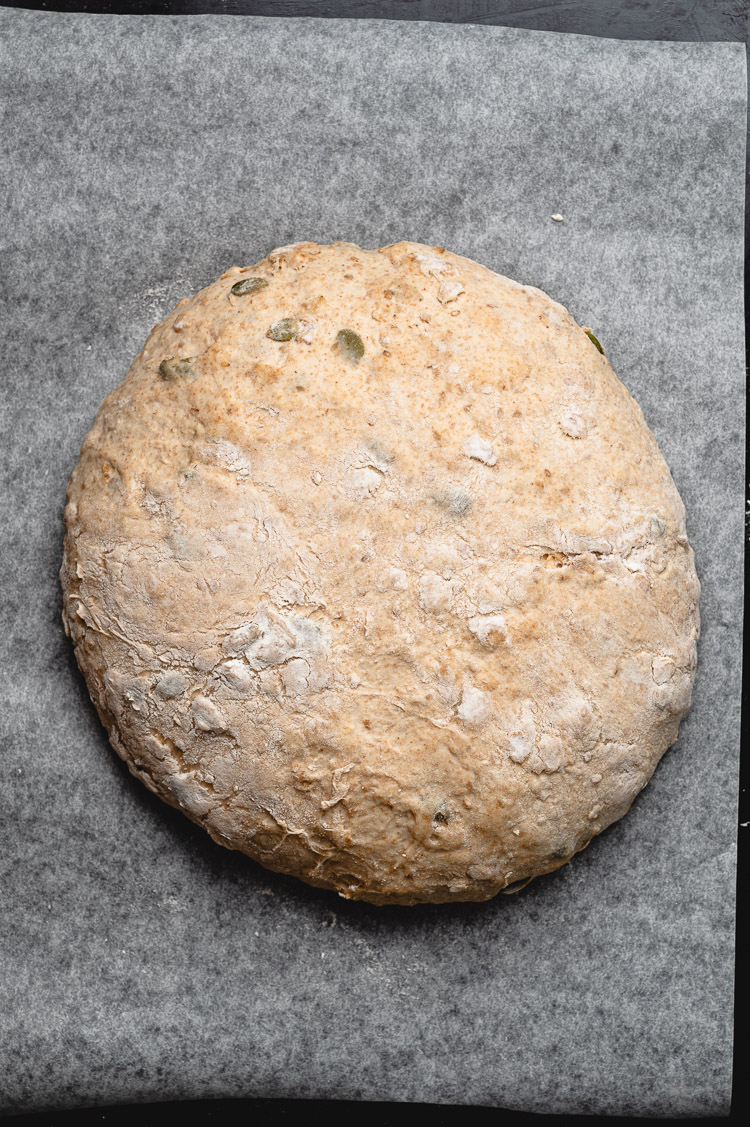
- Shape: Set aside a large sheet of parchment paper for baking the dough on. Turn dough out onto a well-floured surface. Use a bench scraper or rubber spatula to gently pull the corners of the dough into the center to form a ball. Dough is very sticky so try not to use your hands, but if you need to then sprinkle flour on top of the dough and generously flour your hands.
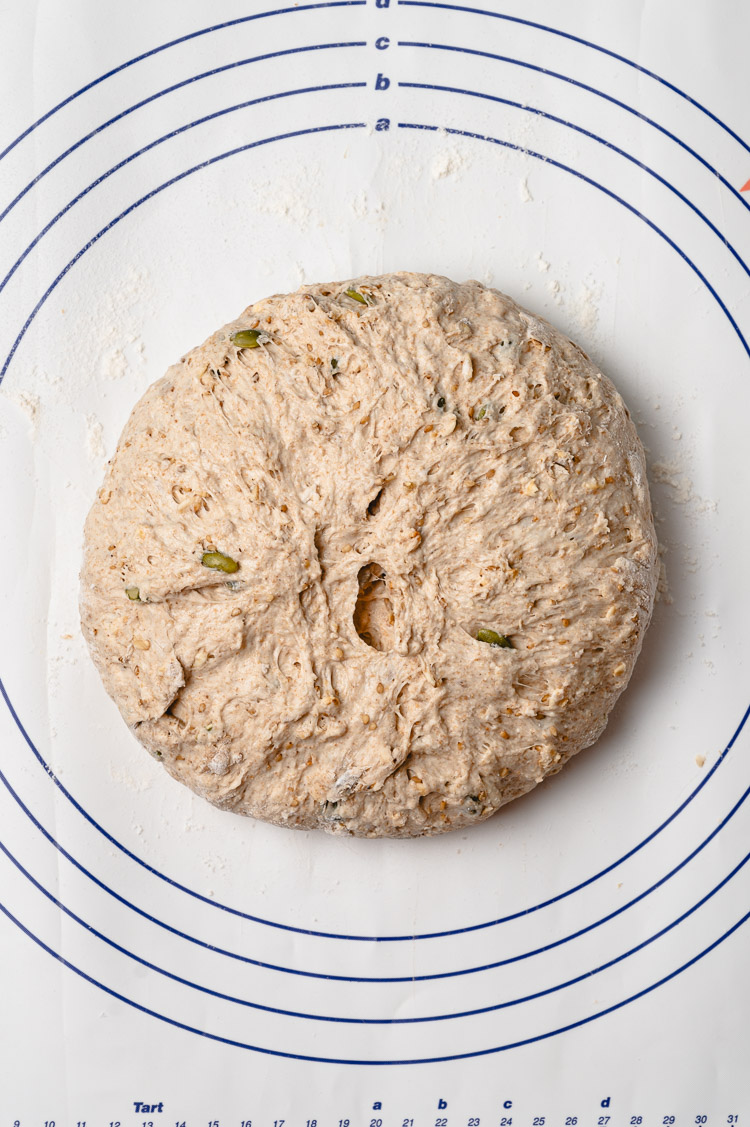
- 2nd Rise: Gently flip dough ball onto the parchment paper. Cover and rest at room temperature for 30 minutes if the first rise was performed at room temperature, or 1 hour if the first rise was done in the fridge.
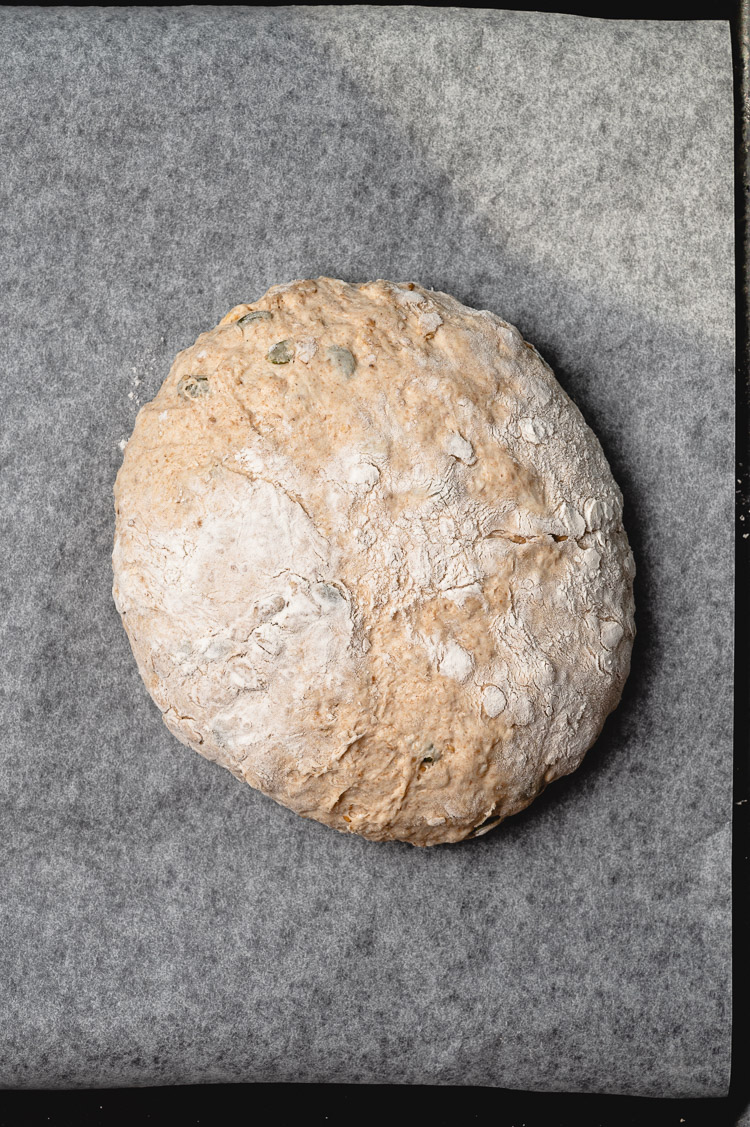
- Preheat: While the dough is rising, preheat your oven to 425°F/220°C.
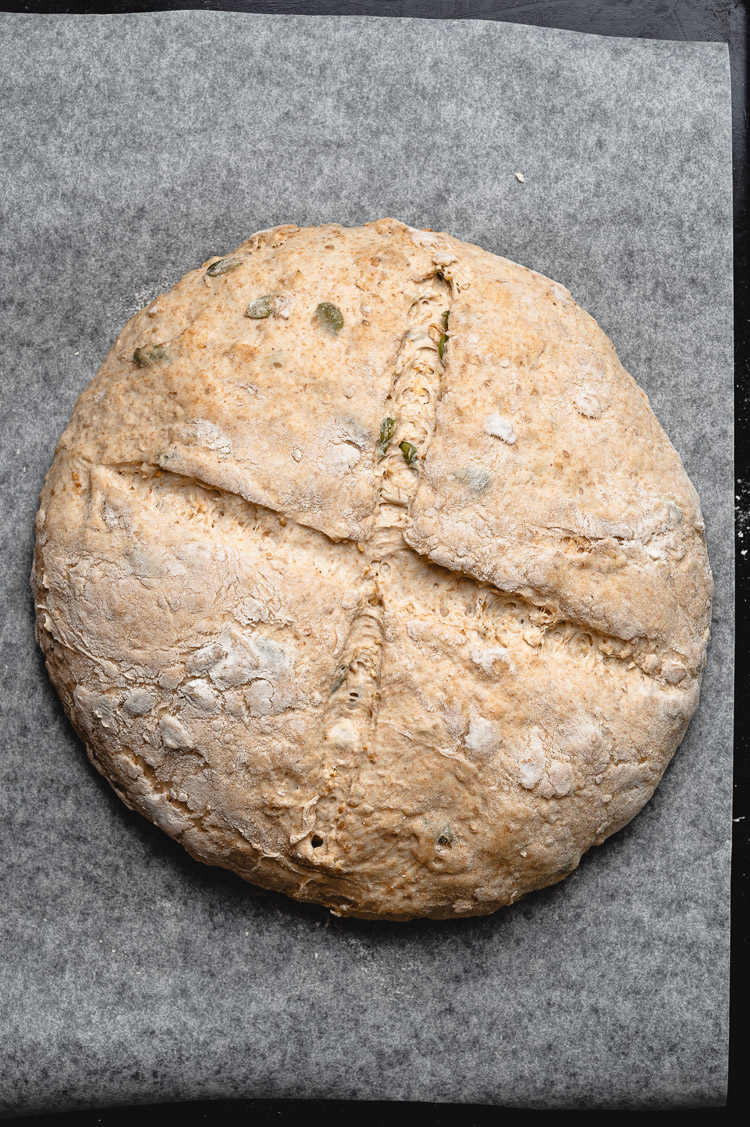
- Dutch oven: If you have a dutch oven (6 quart or larger), place in the oven while it preheats, then let the Dutch oven heat for 20-30 minutes. Once the dough has rested, gently score the top of the dough 1/2-inch deep with a slash or X (this helps the dough "breathe" and expand). Remove the dutch oven from the oven, place the parchment paper and dough inside, cover, and return to the oven. Bake 30 minutes with the lid on, then remove the lid and bake another 10 minutes or until cooked through and golden brown.
- No dutch oven: Once the dough has rested, gently score the top of the dough 1/2-inch deep with a slash or X (this helps the dough "breathe" and expand). Place parchment paper and dough onto a baking sheet and transfer to the oven. Place a metal baking pan on the bottom oven rack. Quickly pour in 4 cups of just-boiled water and shut the oven door to trap the steam in. The steam helps create a crispy, chewy crust. Bake 30 minutes, then remove the pan with water and continue baking another 10 minutes or until cooked through. If the crust is browning too quickly, tent the bread with foil.
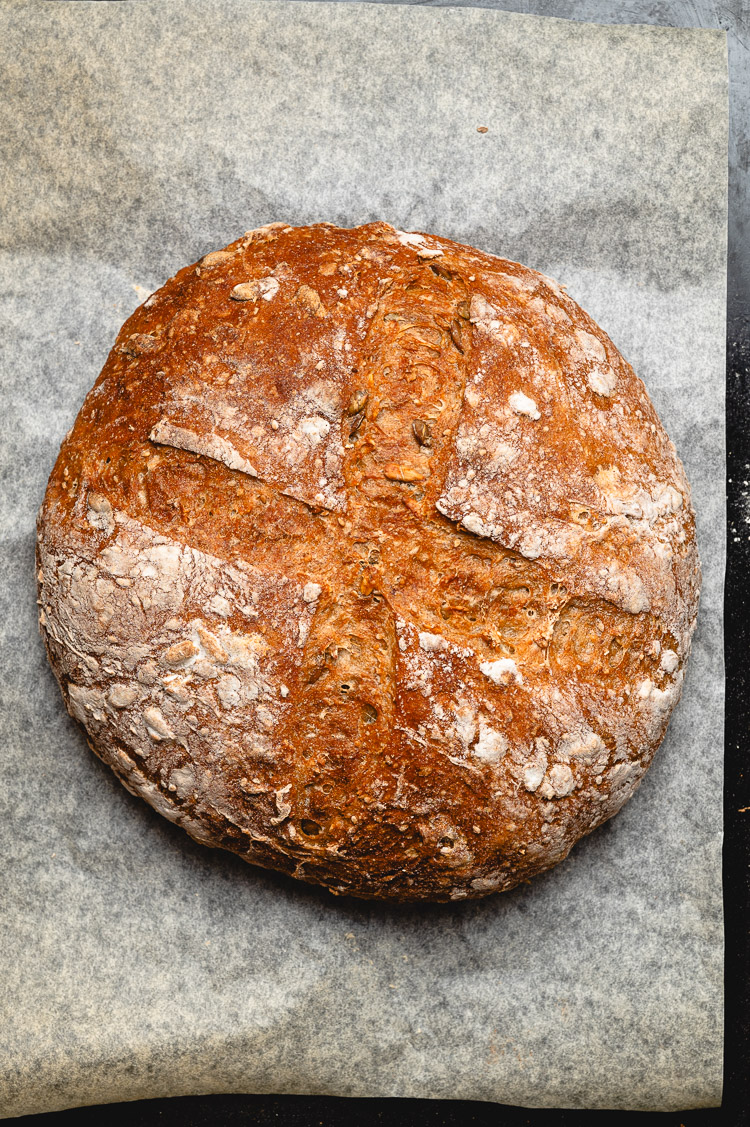
- Test for doneness: Bread is done when the crust is golden brown, it sounds hollow when you tap it, and internal temperature reaches 195°F (90°C).
- Storing: Store leftovers in an airtight container at room temperature for up to 3 days, or cut into slices and freeze for up to 3 months.
Notes

*Disclosure: This page may contain affiliate links. As an Amazon Associate I earn from qualifying purchases, but the price remains the same to you. Thank you for supporting Ellie Likes Cooking!
Save for later!


One Comment