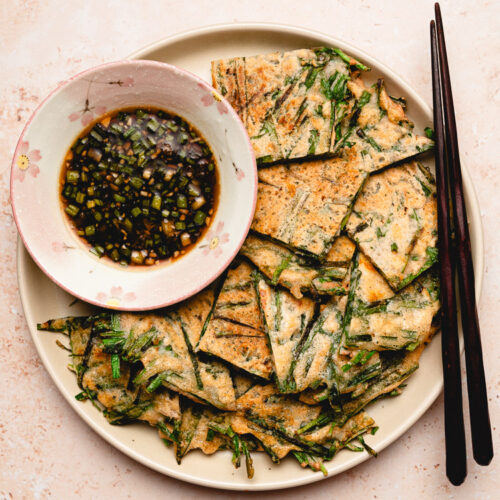
Red Lentil and Chive Pancakes (Chijimi) | レンズ豆のチヂミ
These Korean-inspired chive pancakes are made with a chewy red lentil base. Naturally gluten-free and high in plant protein!
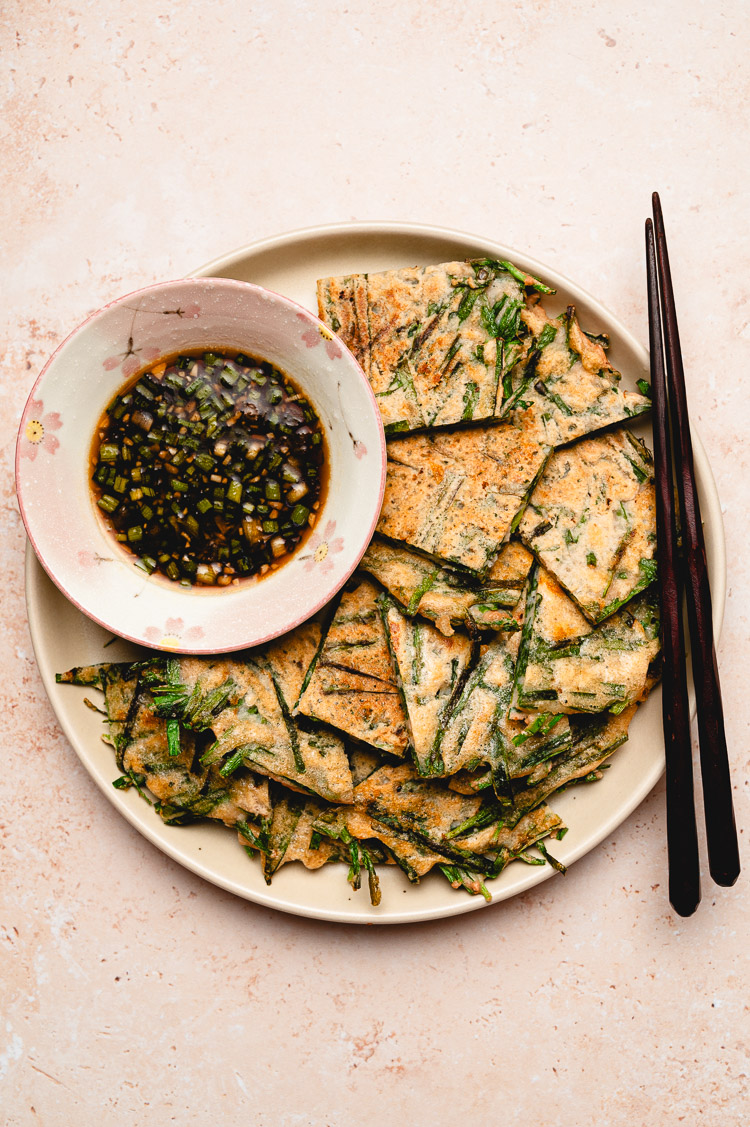
These red lentil and chive pancakes are inspired by Korean chive pancakes (buchujeon), called chijimi in Japanese. They are typically made with wheat flour, but this recipe is made gluten-free and higher in protein thanks to red lentils! All you really need for these pancakes are two main ingredients: red lentils and chives. It’s easy to make and so tasty! Serve it as a side or light main dish. And don’t forget a good dipping sauce to really pack in the flavor!
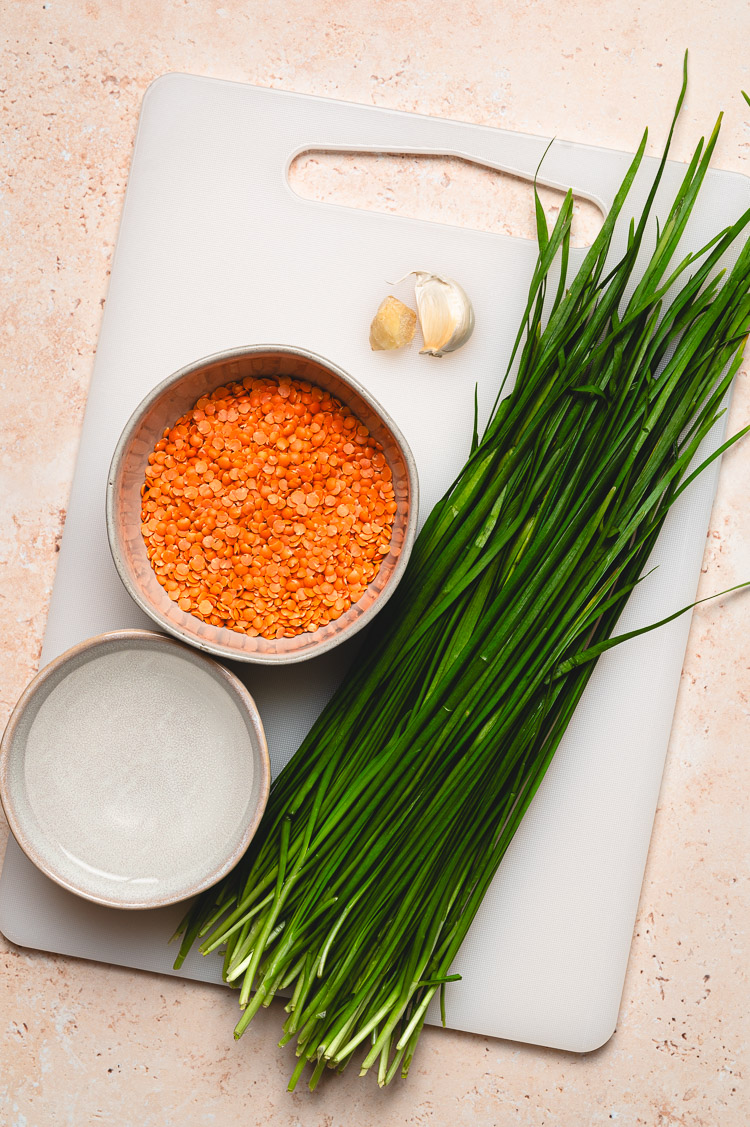
Key Ingredients
- Garlic Chives ⟶ Not to be confused with normal chives. Garlic chives have a pungent, garlicky flavor and are used as a vegetable rather than an herb. You can find them sold in bunches at Asian grocers.
- Dry Red Lentils ⟶ Be sure to use dry, not cooked! Split red lentils will require less soaking time than whole, but either can be used.
- Garlic & Ginger ⟶ Technically you can omit these since garlic chives have a potent flavor on their own, but I like the extra aromatics.

How to Make
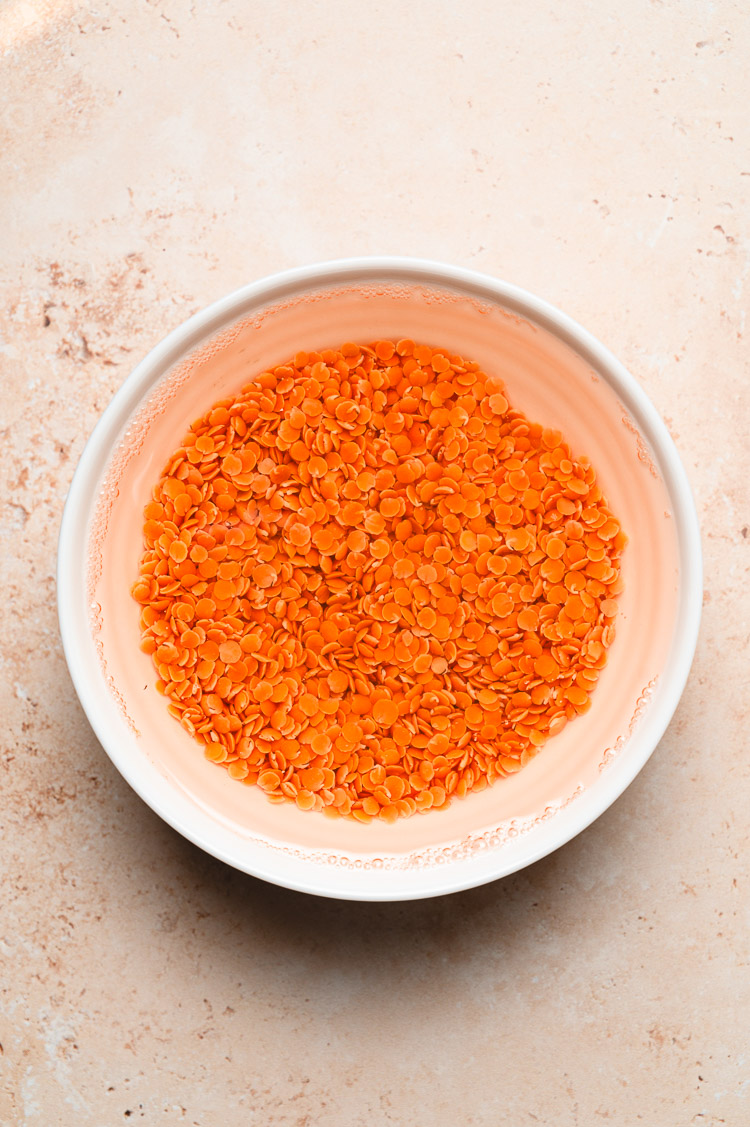
- Soak lentils. This is an essential step to soften the lentils and make them easier to cook and digest. Normally you don’t need to presoak lentils, but since we are just blending them, not boiling them, soaking is necessary.
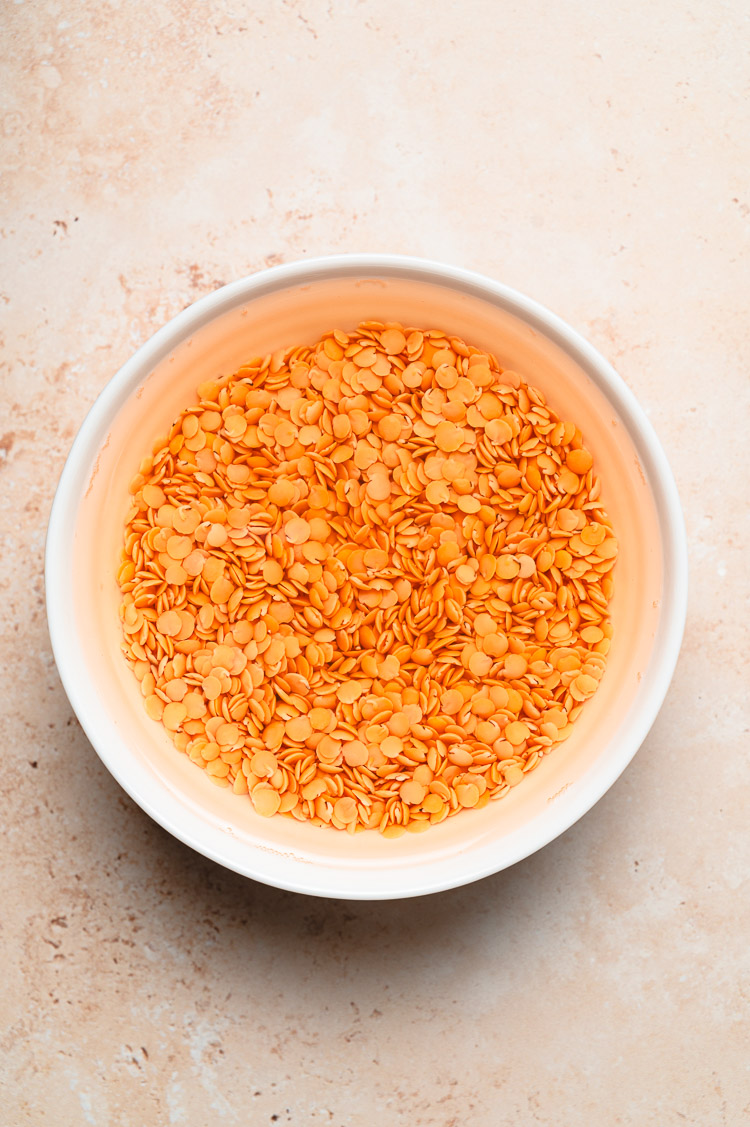
- After 2-4 hours, the lentils will be larger and softer, having soaked up some of the water. Soaking time will be quicker for split red lentils and warm environments.
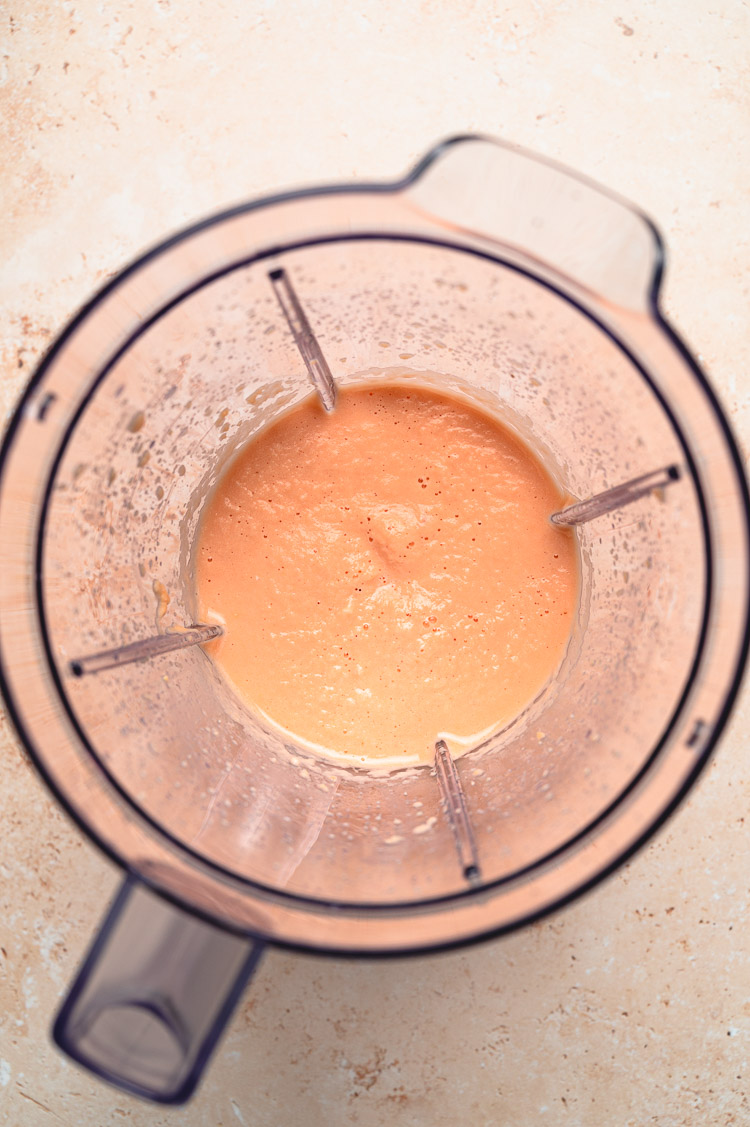
- Blend soaked lentils, garlic, ginger, salt, and water. It may not look like enough liquid to blend but if the lentils are thoroughly soaked they should blend easily.
- The resulting mixture should be smooth and slightly thick, but still drip off a spoon.
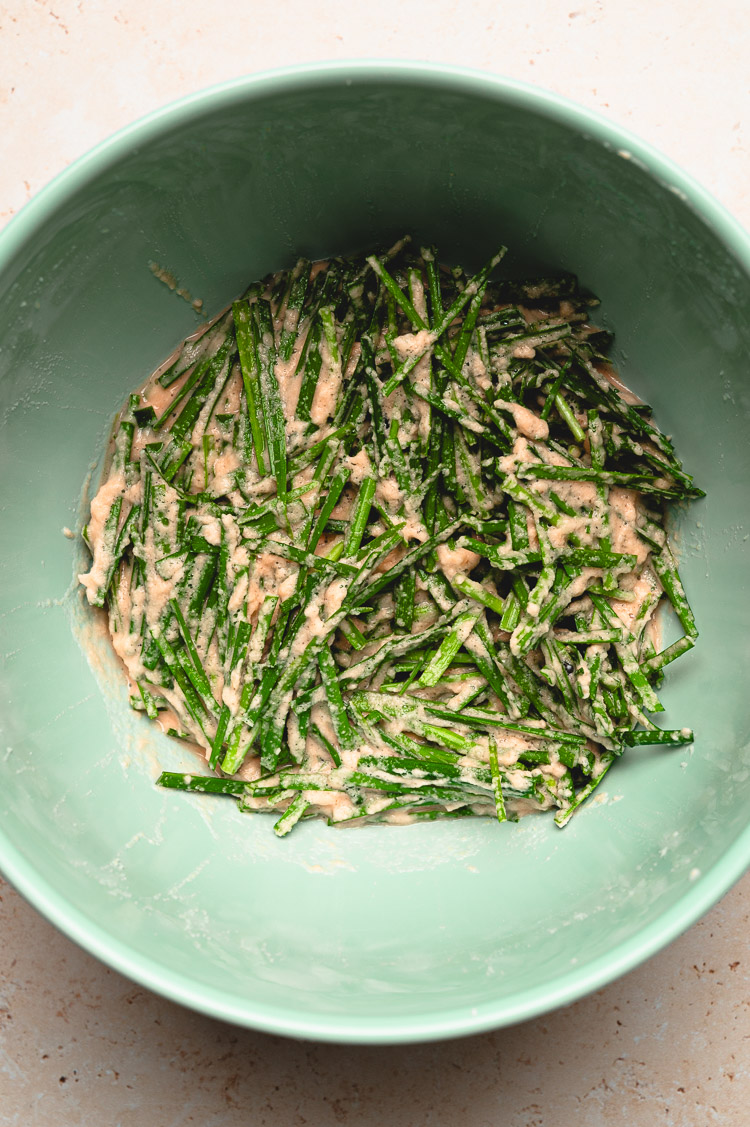
- Mix with chives. I like a lot of chives. It may look like there isn’t enough batter for all the chives but have faith and proceed to cooking.
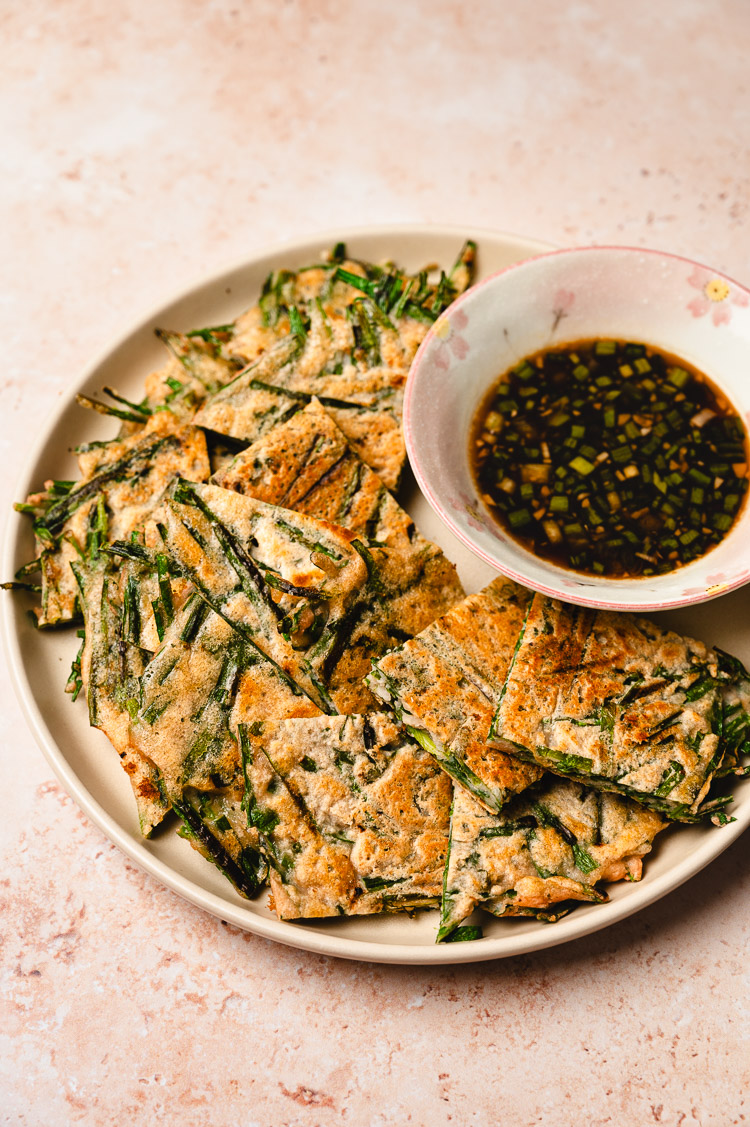
- Pan fry. Heat enough oil to thinly cover the bottom of a large pan and add half the mixture. Spread it out flat into a thin pancake. Cover for 3 minutes to help the lentils cook through, then uncover to brown the bottom. Flip and brown the other side.
Tips for Success
Use dry red lentils ⟶ Make sure you are using DRY lentils, not cooked, otherwise your pancakes will turn out very mushy.
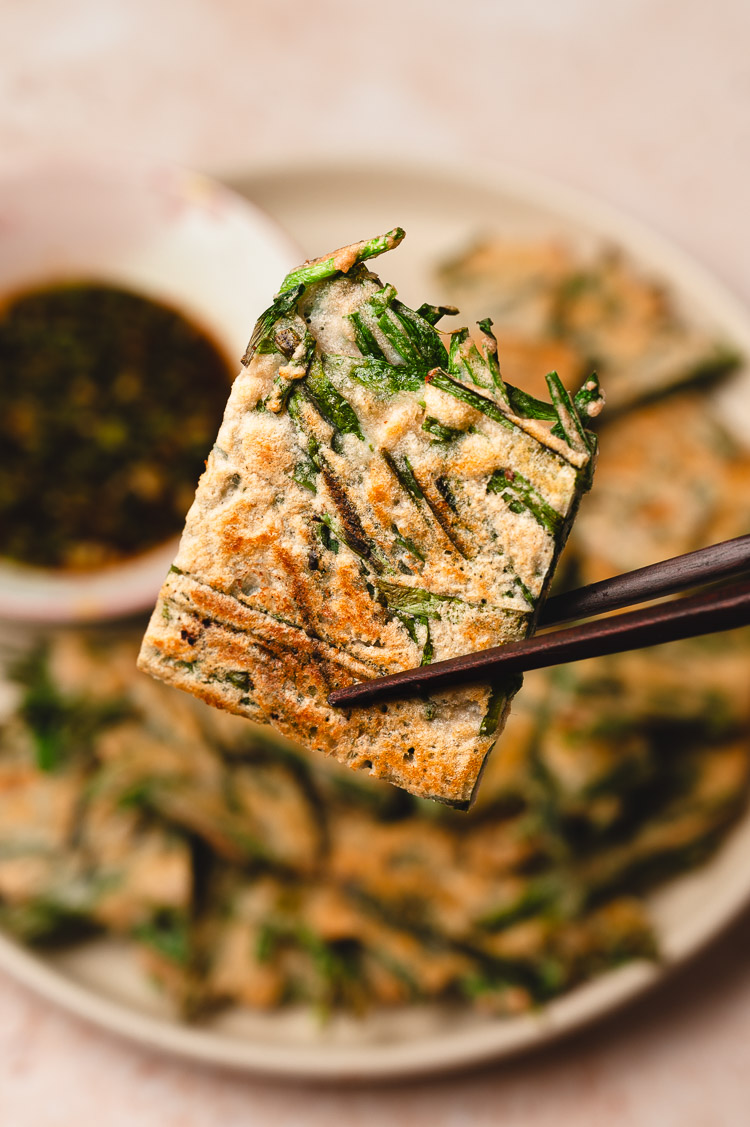
Serve with your favorite sauce ⟶ Along with the dipping sauce included in the recipe card, I also like to serve these chive pancakes with this gochujang miso sauce or this green onion sauce. Feel free to use another sauce you enjoy! The pancakes themselves are light in flavor with just a bit of salt and flavor from the chives.
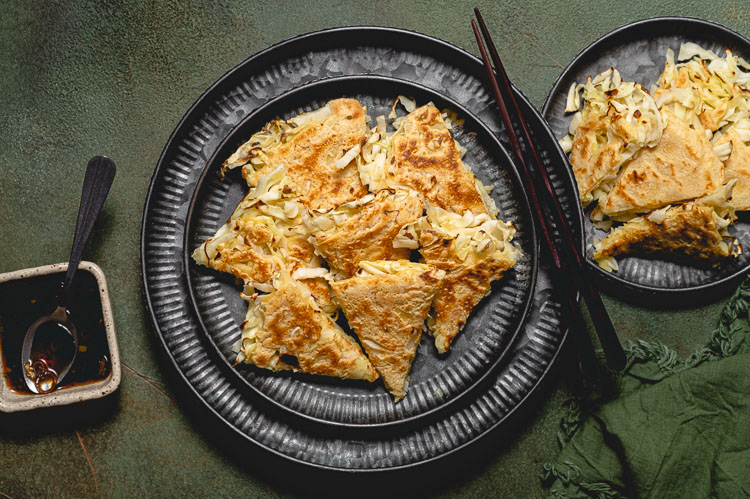
Swap out the chives for another veggie ⟶ If you can’t find/don’t like garlic chives, you can use other veggies like green onions, cabbage, carrots, kimchi. Keep in mind that using more watery veggies (like zucchini or mushrooms) will make the pancakes softer.
Use enough oil ⟶ Because the base of these pancakes is red lentils, they don’t get as crispy as regular flour-based pancakes/fritters. But using enough oil (meaning really coating your pan in a thin layer) can help the outsides brown and crisp up more.
More Hearty Asian Sides
- Easy Cabbage Pancakes
- Tofu Cabbage Rolls with Peanut Sauce
- Tofu Mochi Isobeyaki
- Vegan Tuna Mayo Onigiri
- White Bean Korokke
If you try out these red lentil and chive pancakes, don’t forget to leave a comment/rating down below and tag me in your photos on instagram @ellielikes.cooking. I love seeing all of your tasty recreations!
Red Lentil and Chive Pancakes (Chijimi)
Ingredients
- ½ cup dry red lentils
- 3-4 oz garlic chives cleaned and trimmed
- ¼ cup water
- ¼ tsp salt
- 1 clove garlic minced
- 1 tsp ginger minced
- oil for frying
Dipping Sauce
- 1½ tbsp low sodium soy sauce or tamari for gluten-free
- 1½ tbsp rice vinegar
- ½ tbsp sugar
- 2 tbsp water
- 1 tsp toasted sesame oil
- 1 tbsp green onion chopped, optional
Instructions
- Rinse & soak lentils: Thoroughly rinse lentils until the water runs clear. Then add rinsed lentils to a bowl and add enough water to cover the lentils by 2 inches. Soak lentils for 2-4 hours at room temperature. The lentils will soak up some of the water and soften.
- Prep chives: Trim off the tough stems and thoroughly rinse the garlic chives. Cut into 2-inch pieces.
- Blend: Drain and rinse soaked lentils. Add to a blender along with the water, salt, garlic, and ginger. Blend until smooth. The mixture will be slightly thick.
- Mix in chives: Place chives in a large bowl and pour in the blended mixture. Stir well to combine.
- Cook: Heat about one tablespoon of oil in a large skillet over medium heat. Scoop half the mixture into the skillet and spread it out flat into a thin pancake. Cover for 3 minutes, then uncover and cook another minute or so until browned on bottom. Flip and cook, uncovered, until browned on the other side, 2-3 minutes.
- Transfer pancake to a cutting board and repeat the cooking process with the rest of the batter. Cut pancakes into sections. Mix together dipping sauce or serve with another sauce of choice.

*Disclosure: This page may contain affiliate links. As an Amazon Associate I earn from qualifying purchases, but the price remains the same to you. Thank you for supporting Ellie Likes Cooking!
Save for later!
Love it, I make it at least twice every month and never get tired
Thanx for this and am any other awesome recipes.