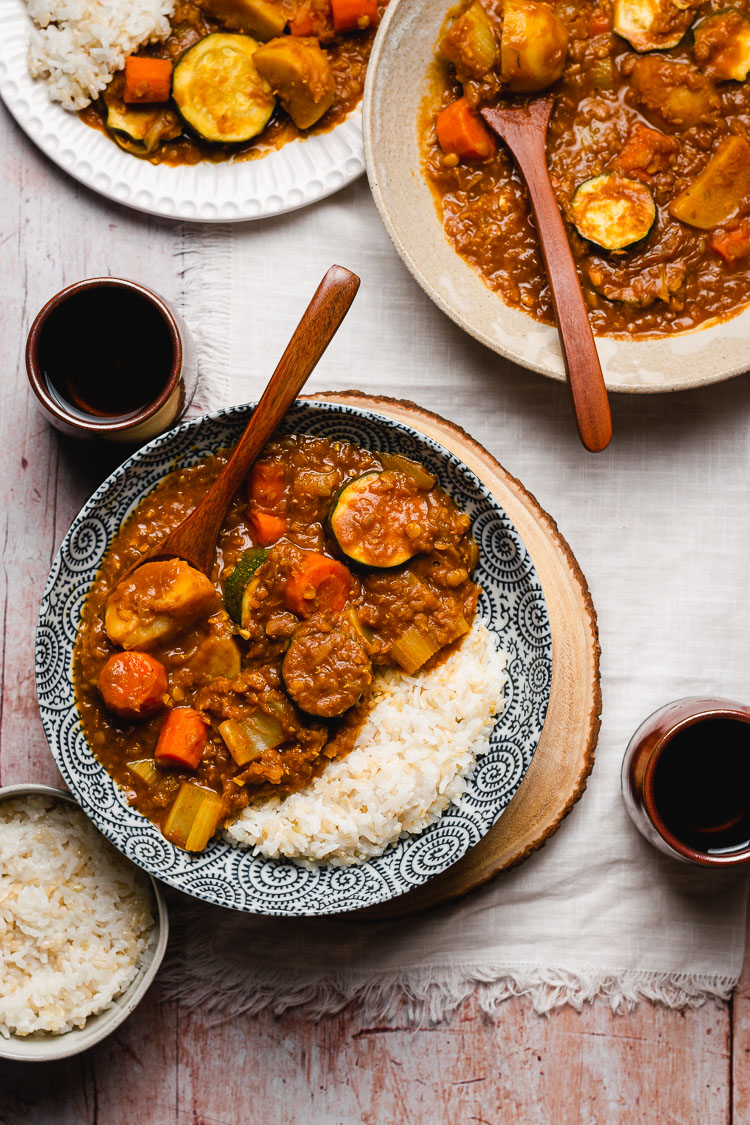
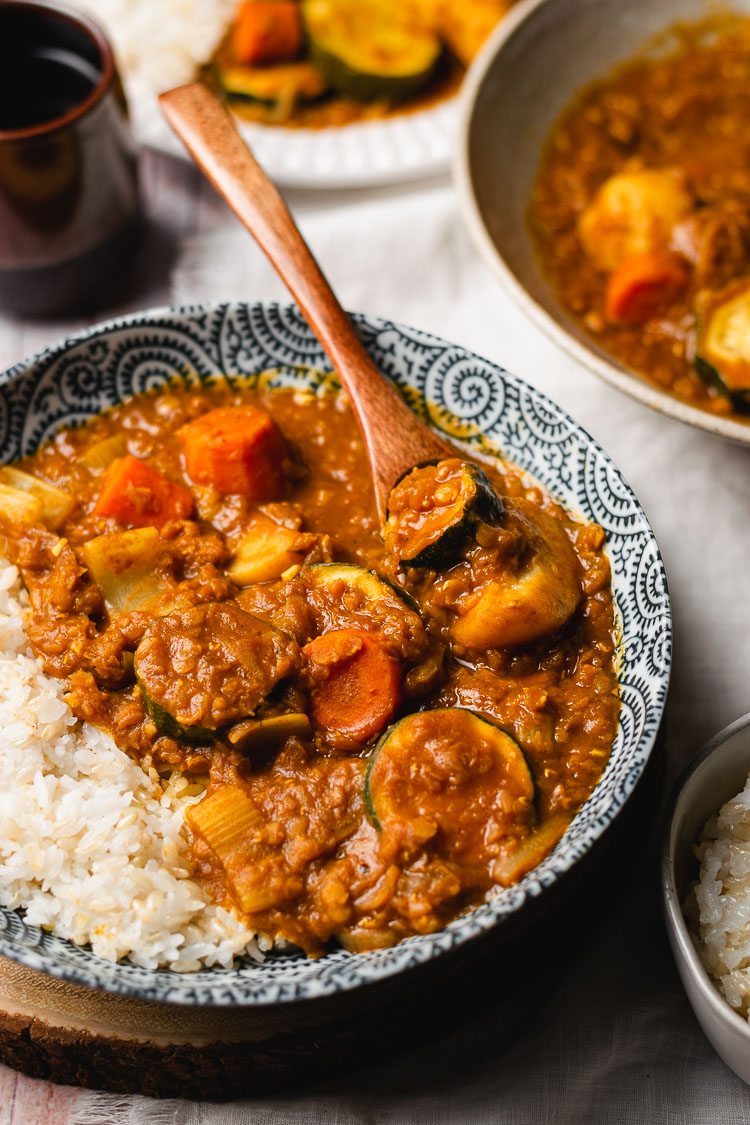
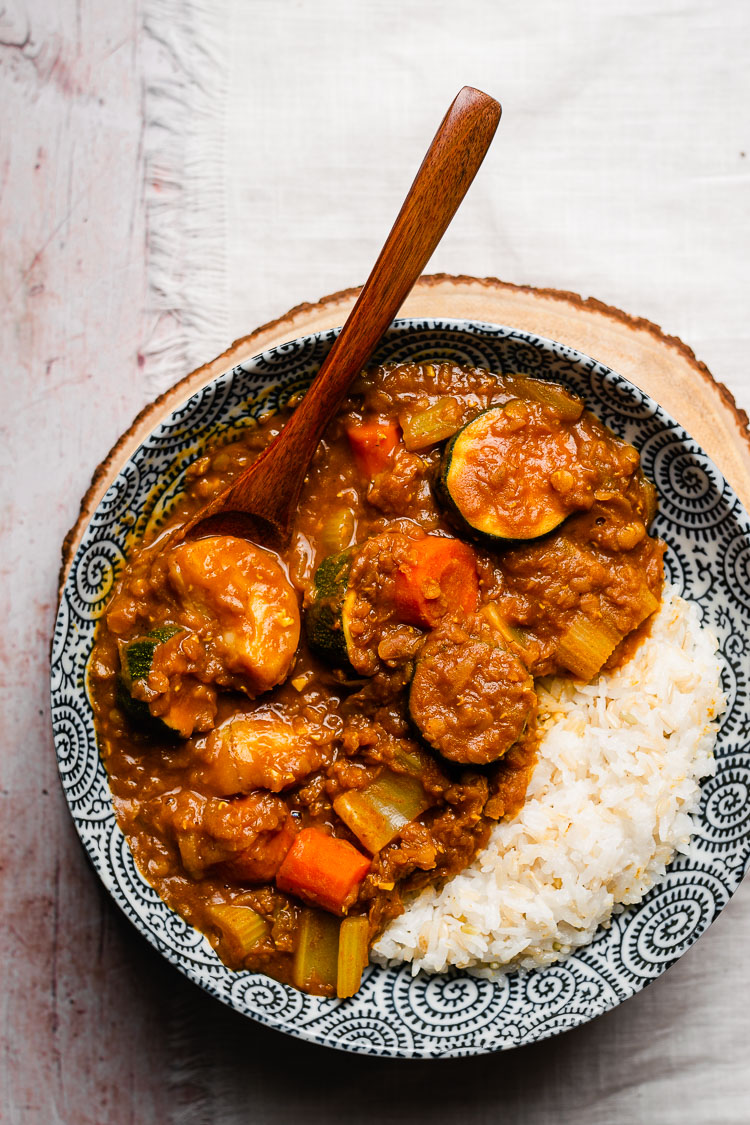
Vegan Japanese Curry with Red Lentils (Gluten-Free)
Learn how to make Japanese curry, roux and all, from scratch with this easy vegan recipe. Hearty, healthy comfort food made in your own kitchen!
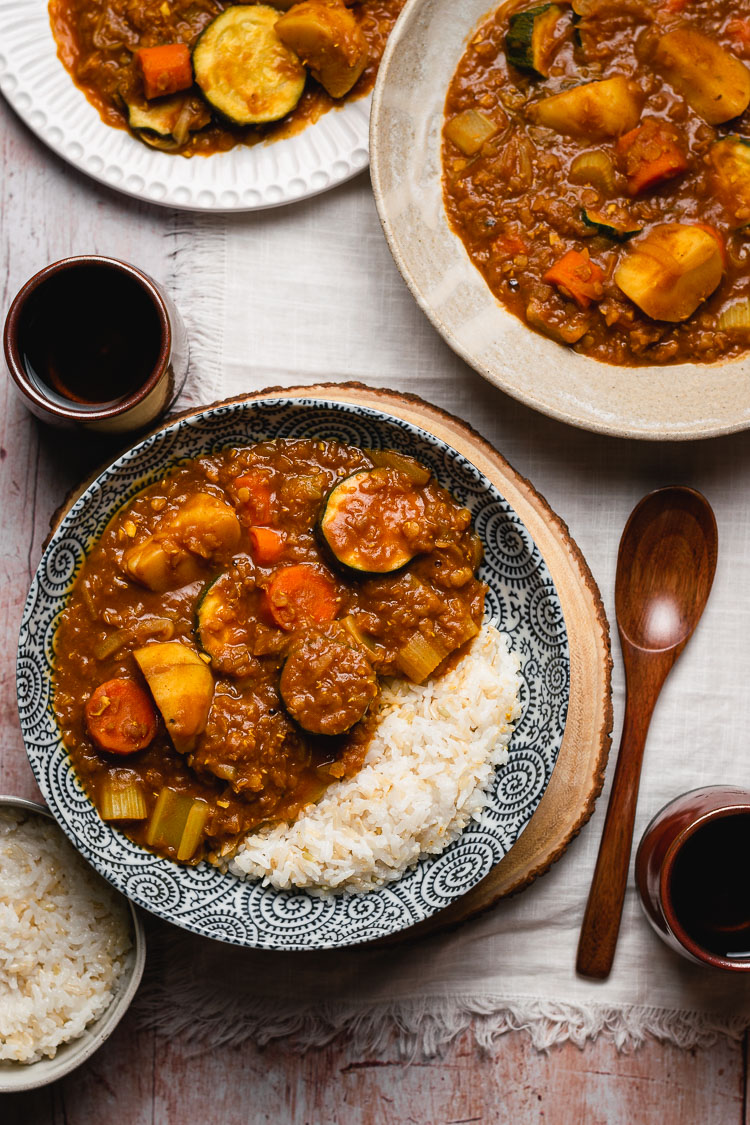
Curry rice (カレーライス) is a staple in Japanese home cooking because it is delicious, filling, and can be made easily with boxed roux. While boxed roux is very convenient and delicious, sometimes it’s hard to come by and may contain dairy or other animal products. Not to mention there can be lots of preservatives and sodium in some, so when you have time I highly recommend making your own roux. Homemade food always tastes better in my opinion!
Brief History of Japanese Curry
Curry was introduced to Japan by the British navy, who were influenced by Indian curry, during the Meiji Restoration (1870s). The British navy brought curry powder with them as an easy, tasty way to feed their sailors. At this time, the Japanese navy was looking for a better way to feed their sailors, since their diet of mostly white rice seemed to be insufficient – many Japanese soldiers and sailors were dying from beriberi, a vitamin B1 (thiamine) deficiency. Curry rice soon became a standard meal in the Japanese navy, and its popularity gradually spread to civilians as well. The first Japanese curry recipe was published in 1872, and by 1877 restaurants in Japan were serving it as well. By the early 1900s, curry became a popular dish in Japanese households, and to this day it’s still a staple meal! These days there are endless variations of curry and each family makes it a little differently. Along with curry rice, there’s also soup curry, curry udon, and curry pan (deep-fried bread coated with panko and filled with curry).
Key Ingredients
Roux
Roux is made with equal parts fat and flour (measured in grams!). Butter is commonly used to impart more flavor, but to make this vegan I use oil. You can use vegan butter if you’d like. We also add the curry powder after the flour has browned, just to toast it and activate the flavors a little.
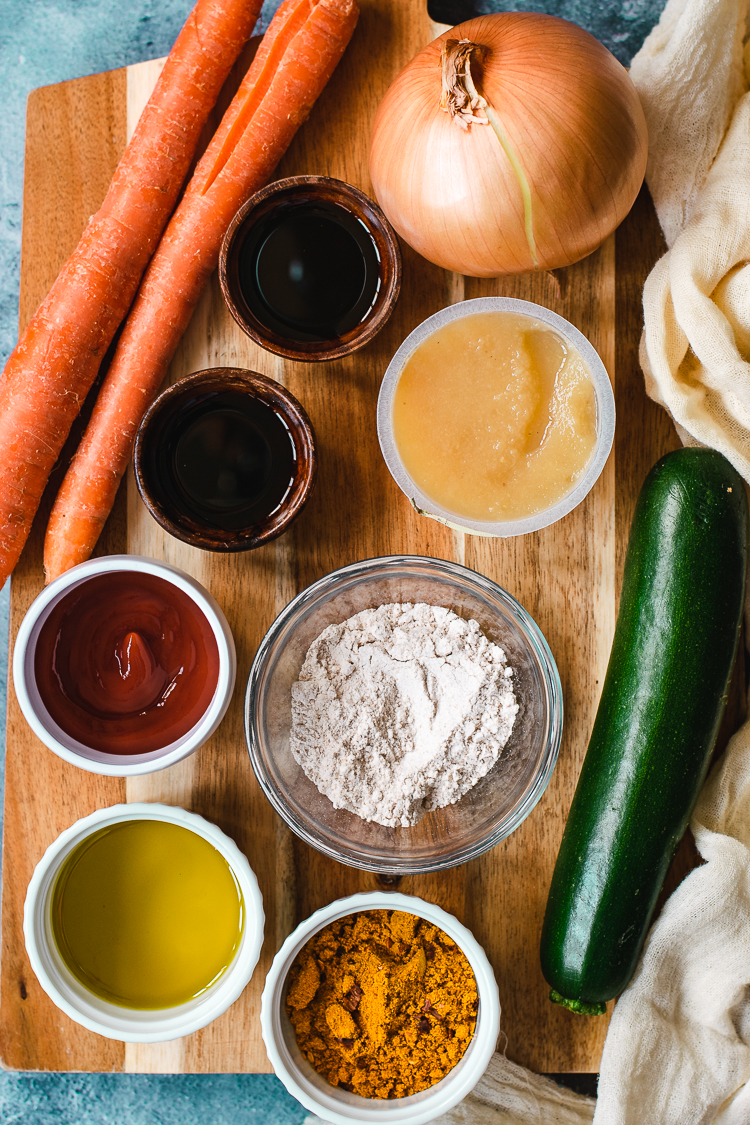
- Oil ⟶ I personally like using olive oil, but if you don’t like the flavor of olive oil then use a neutral oil such as vegetable oil, canola oil, grapeseed oil, avocado oil, or refined coconut oil. You can also use vegan butter.
- Flour ⟶ I use good ol’ all purpose flour, but you can use a gluten-free flour if you’d like (just be careful of the cooking temperature, as some flours may brown more easily depending on what they’re made of).
- Curry Powder ⟶ Since this is a Japanese curry, you want to use Japanese curry powder if you can find it (or make your own blend). I use S&B curry powder*.
- Cocoa/Cacao Powder* ⟶ In Japanese, we call this kakushi aji or hidden flavor. It’s not an essential ingredient, but it helps bring out the other flavors and also creates that deep, dark curry color we know and love.
Curry
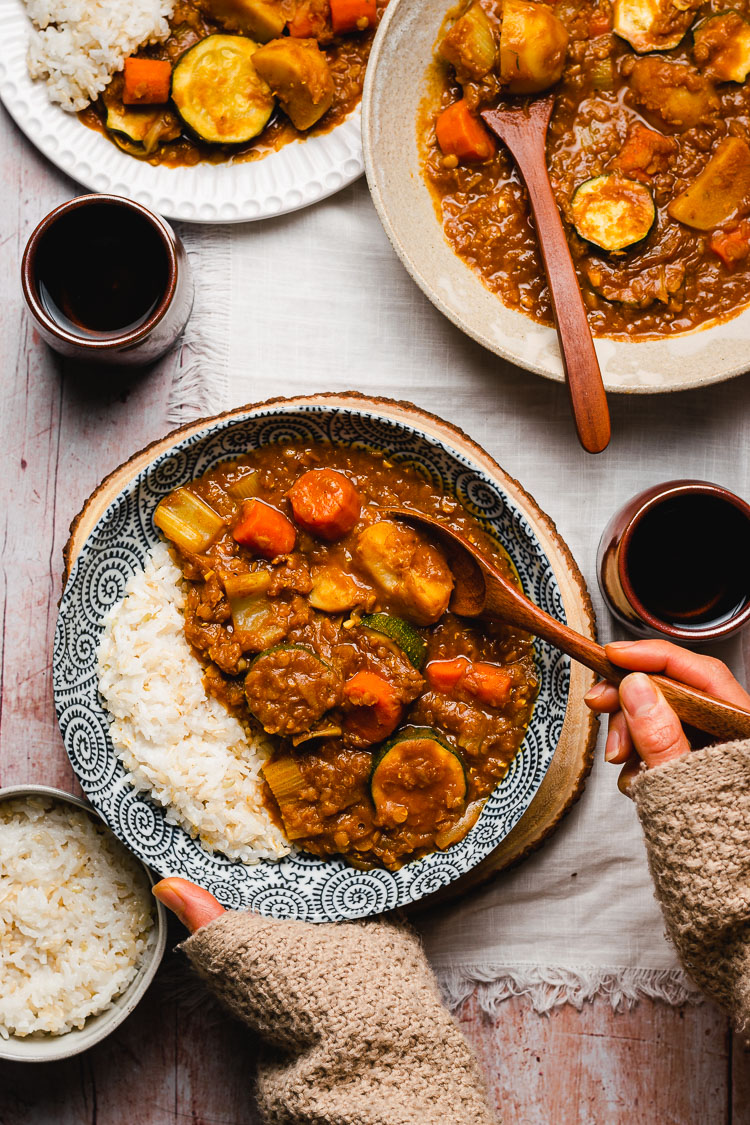
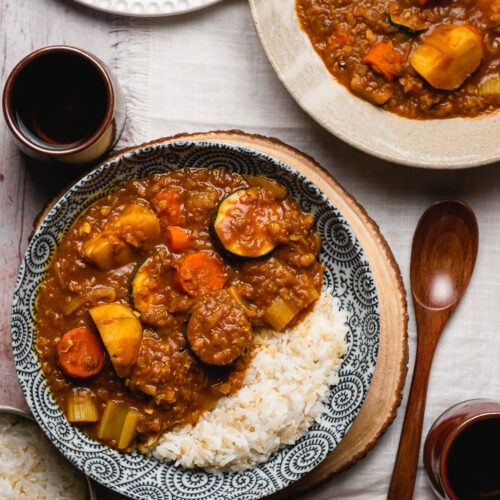
You can customize your curry as you like. Add in different vegetables (I almost always use carrots, celery, zucchini, and mushrooms – broccoli is good too as the florets soak up the curry flavor nicely), leave the lentils out (but use about half as much vegetable broth), add soy curls, serve it with tofu katsu, or just keep it simple. You do you! However, there are a few key ingredients you’ll want to keep:
- Garlic, Ginger, Onions ⟶ the aromatics of this dish (in addition to the roux, of course) and key for good flavor
- Japanese Worcestershire Sauce ⟶ I like Bull Dog Chuno Sauce* but use what you can find (check the ingredients though as some may contain fish extract).
- SUB: If you can’t find Japanese Worcestershire sauce, you can use a regular vegan brand and add more applesauce or sugar as it won’t be as sweet. Or you can make your own!
- Tomato Paste ⟶ adds a little umami and sweetness, and also helps to thicken the curry
- SUB: ketchup
- Soy Sauce ⟶ adds umami and salty flavor
- Use tamari for a gluten-free option.
- Fruit Puree ⟶ makes the curry slightly sweet
- Apples are most commonly used, but I’ve also used persimmons (my favorite!), pears, and peaches!
How to Make Japanese Curry Roux
Making the roux does take some time (about 10-15 minutes) and you have to stir constantly, but it is SO worth the effort. Plus you can make a huge batch at once and freeze the leftover! (Freeze the roux in an ice cube tray first, then once frozen you can transfer the cubes to a freezer bag.) Nicely browned roux really adds a lot of flavor and makes this curry shine. Here’s what you need to do:
- Heat the oil in a large pot over medium low heat. Once the oil is shimmering, add the flour and stir, stir, stir! Don’t let any of the flour sit in one place too long or it will burn.
- The roux will gradually change from white to blond to brown like peanut butter and then dark brown. I stop my roux around the peanut butter stage.
- Add the curry powder and cocoa powder. Stir for another minute, then turn off the heat.
- You don’t want to keep the roux in the pan since it will continue to cook from the residual heat. Very carefully — since it is VERY hot — transfer the roux into a separate bowl.
Japanese Curry FAQ
Can I make the roux in advance?
Yes! In fact, I highly recommend making a large batch of roux and freezing it in ice cube trays. It will last for months in the freezer, and you’ll have a delicious pot of curry ready in no time! Let the roux cool to room temperature, then freeze in ice cube trays. Once the roux has frozen into blocks, pop them out of the ice cube tray and store in a freezer-safe bag. For a large batch of roux (about 20 servings), use: 110 grams oil/butter, 110 grams flour, 60 grams curry powder, 10 grams cocoa powder.
Can I make it gluten-free?
Yes! Use tamari instead of soy sauce, and use a gluten-free all purpose flour. Be mindful of the cooking temperature as I’ve found some flours to burn more easily.
Where can I buy Japanese curry powder?
I get mine from a local Japanese market, but you can also buy it online from Amazon*.
Can Japanese curry be frozen?
Yes, but remove the potatoes first. Potatoes do not freeze well, so remove the potatoes from the curry and keep them in the fridge to eat over the next few days. The rest of the curry should freeze just fine.
How do I reheat curry?
For optimal results, reheat your curry on the stove. You can use the microwave, but the flavor and consistency will be best on the stove.
How is Japanese curry different?
While it originated from Indian curry, Japanese curry is nothing like it now. Japanese curry is much less spicy with a milder, sweet flavor. Its flavor is more subdued, but in a way that makes it comforting, delicious, and leaves you craving more.
More Japanese Comfort Food!
- Vegan Hayashi Rice(ビーガンハヤシライス)
- White Bean Korokke (コロッケ)
- Kabocha Soup(かぼちゃスープ)
- Curry Udon(カレーうどん)
- Tofu Gyoza(豆腐餃子)
- Miso Glazed Eggplant(ナスの味噌だれ)
- Tofu and Eggplant Ginger Stir Fry(豆腐と茄子の生姜焼き)
- One Pot Spicy Miso Ramen(ビーガン辛味噌ラーメン)
- Air-Fryer Vegan Karaage(ビーガン唐揚げ)
I hope I’ve inspired you to make your own Japanese curry from scratch! If you try it out, don’t forget to tag me in your photos on instagram @ellielikes.cooking, leave a comment/rating down below, and let me know how you liked it! I love seeing all of your tasty recreations 🙂 Happy cooking! ♡
*Recipe updated May 13, 2025 with improved method and notes.
Vegan Japanese Curry with Red Lentils
Ingredients
Roux1
- 22 grams (about 1 tbsp + 2 tsp) oil or vegan butter
- 22 grams (about 3 tbsp) all purpose flour or gluten-free all purpose flour
- 12 grams (2 tbsp)
Japanese curry powder* - 2 grams (1 tsp)
cocoa or cacao powder*
Curry
- 1 tbsp cooking oil
- 1 onion thinly sliced
- 3 garlic cloves minced
- 1 inch knob of ginger minced
- 2 medium carrots chopped
- 1-2 celery chopped
- 2 tbsp tomato paste
- 3 cups vegetable broth or water2
- 2 medium potatoes chopped
- 1 cup split red lentils3
- 1 grated apple4 adjust to desired sweetness
- 1 zucchini sliced
- 1-2 tbsp
Japanese Worcestershire sauce* - 1 tbsp
soy sauce* or tamari for gluten-free
Instructions
- Make roux: Heat oil in a pan over medium low heat. When hot, add in flour and stir constantly until it turns light brown, about 15-20 minutes. (The roux should be thin and stirrable. If it's too thick, add extra oil about a teaspoon at a time until thinned.)
- Once brown, add in curry powder and cacao powder and mix briefly, about 30 seconds. Take off from the heat and set the roux aside.
- Make curry: Heat cooking oil in a large pot. Add onions and cook until lightly caramelized.
- Add garlic, ginger, carrots, and celery and cook 5 minutes, stirring frequently.
- Add tomato paste and stir for 30 seconds.
- Add in broth, potatoes, lentils, and grated apple. Bring to a boil then lower to simmer for 10-15 minutes until lentils and potatoes are tender. Add extra broth/water if needed.
- Add the zucchini, Worcestershire sauce, and soy sauce.
- Remove some of the liquid into a bowl with the roux. Stir until roux dissolves.
- Add roux to curry and simmer on low heat another 5 minutes.
- You can serve immediately but the flavors in the curry develop more as the curry sits. Leftover curry is even more delicious the next day! Serve with rice.
Notes

*Disclosure: This page may contain affiliate links. As an Amazon Associate I earn from qualifying purchases, but the price remains the same to you. Thank you for supporting Ellie Likes Cooking!
Save for later!

Simple and good recipe.
Hello.
I wonder if it would work to use split green peas or whole green or brown lentils if I soaked and/or cooked them longer?
Thank you,
Hiroshi
I think it would work with green or brown lentils, but the cook time will be longer. Split peas take much longer to cook, so I would cook those first separately then add to the curry near the end. You can also use cooked chickpeas or even crumbled tempeh and reduce the amount of broth.
I decided to try it with black lentils. I soaked the lentils the night before to reduce the cook time and then pre-cooked them separately before adding them. It took a bit longer for my curry to reduce down at the end to thicken after adding the roux in (maybe because I used GF AP flour?), but it all turned out tasting very flavourful and amazing. I don’t even like black lentils very much on their own because they’re a bit strong tasting, but in the curry they are perfectly spiced with the soy sauce, curry powder, tomato paste (I use a homemade beet-carrot mixture as I cannot tolerate tomatoes), ACV (subbed for the Worcestershire sauce) and applesauce. I actually didn’t use any oil (because I can’t tolerate that either) in the roux and cooked the flour in water and then added it and it all still turned out thick, rich, and smooth. I also didn’t use any other spices or vegetables (as I can’t use garlic or onions nor eat potatoes either and don’t have really good access to great vegetables) except for 1 large zucchini cut up in fourths. I like that I was able to adapt this recipe to my dietary needs and simplify it further and that it is easy to follow and tastes great even with substitutions. I also added some hemp seeds (15g) to replace the fat from the oil as I can eat moderate amounts of seeds and nuts, so maybe that helped with the richness too. It made quite a bit too and is perfectly good on its own, even without rice. I would definitely make it again and try different lentils out as well, maybe different beans too.