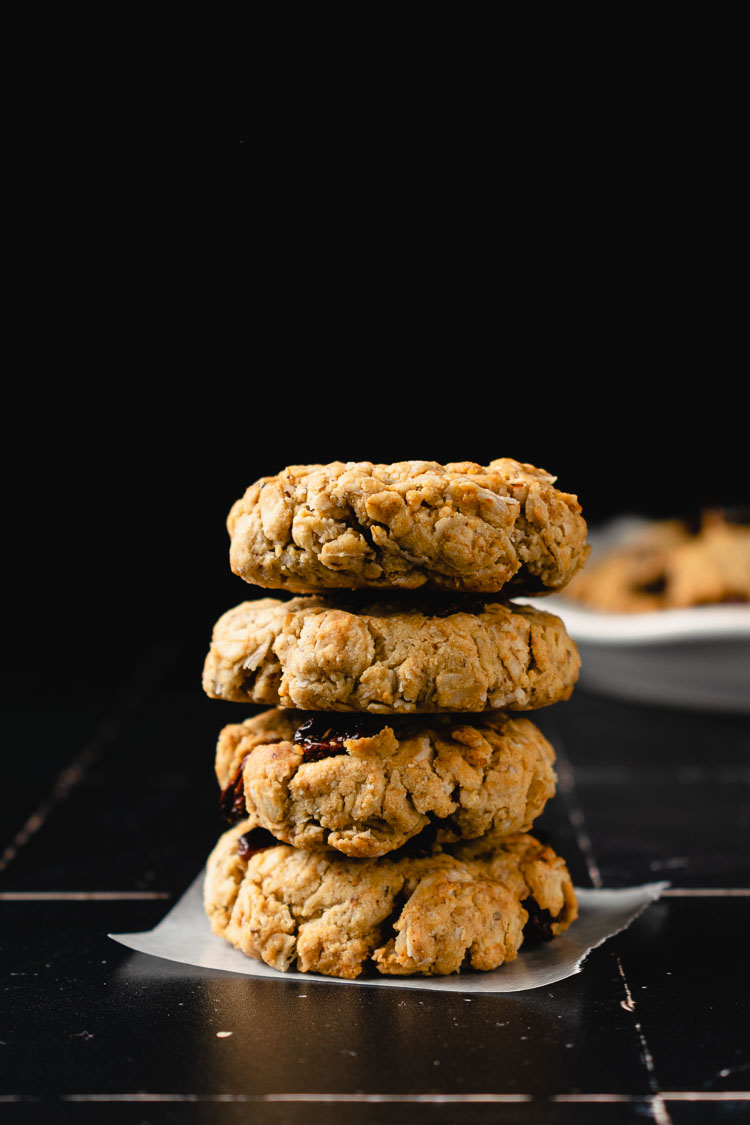
Chewy Oatmeal Raisin Cookies (Wholesome Vegan Cookies)
Chewy vegan oatmeal raisin cookies made healthier with almond flour, almond butter, and maple syrup. One bowl, under 10 ingredients, and gluten and oil-free!
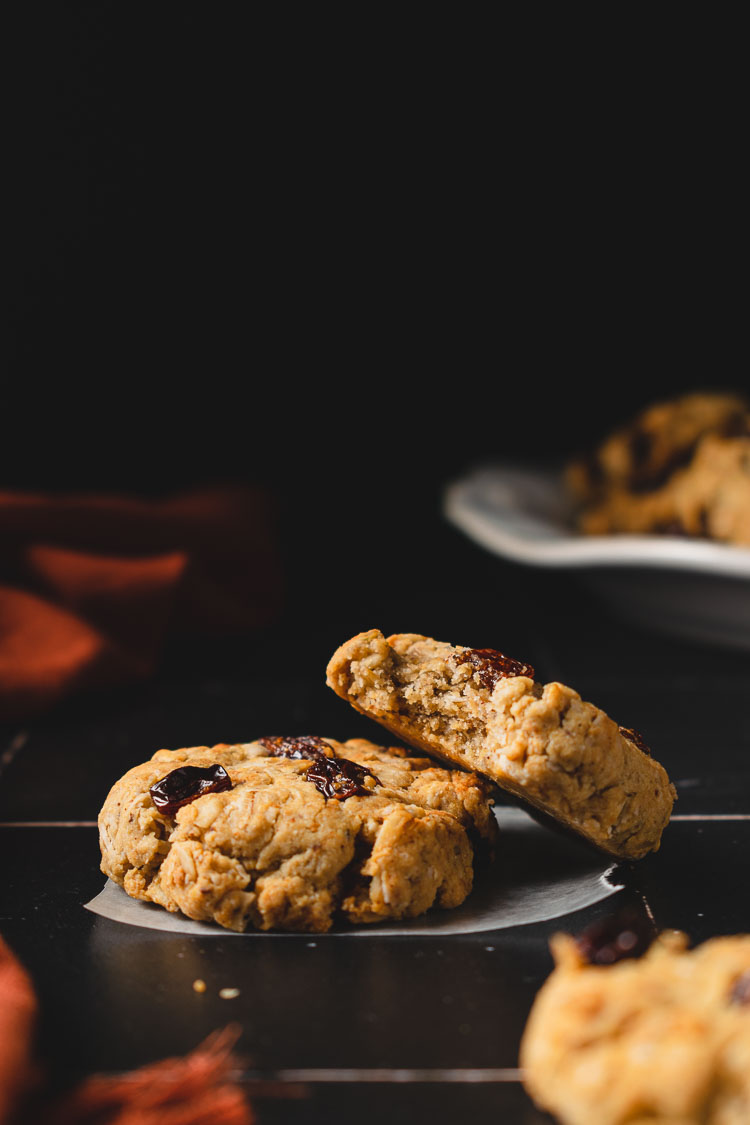
99% of the time, chocolate is my dessert of choice, but when it comes to cookies oatmeal raisin has always been my favorite. The combination of hearty oats and juicy raisins is just too good to pass up. And while I do love a traditional oatmeal raisin cookie, I can easily eat 5 in one sitting, so I decided to make a healthier version that is just sweet enough, made with whole grains and healthy fats, but most importantly still tastes like an oatmeal raisin cookie. And I am proud to say that these cookies check all those boxes. Ready to make some for yourself? Let’s dive into it.
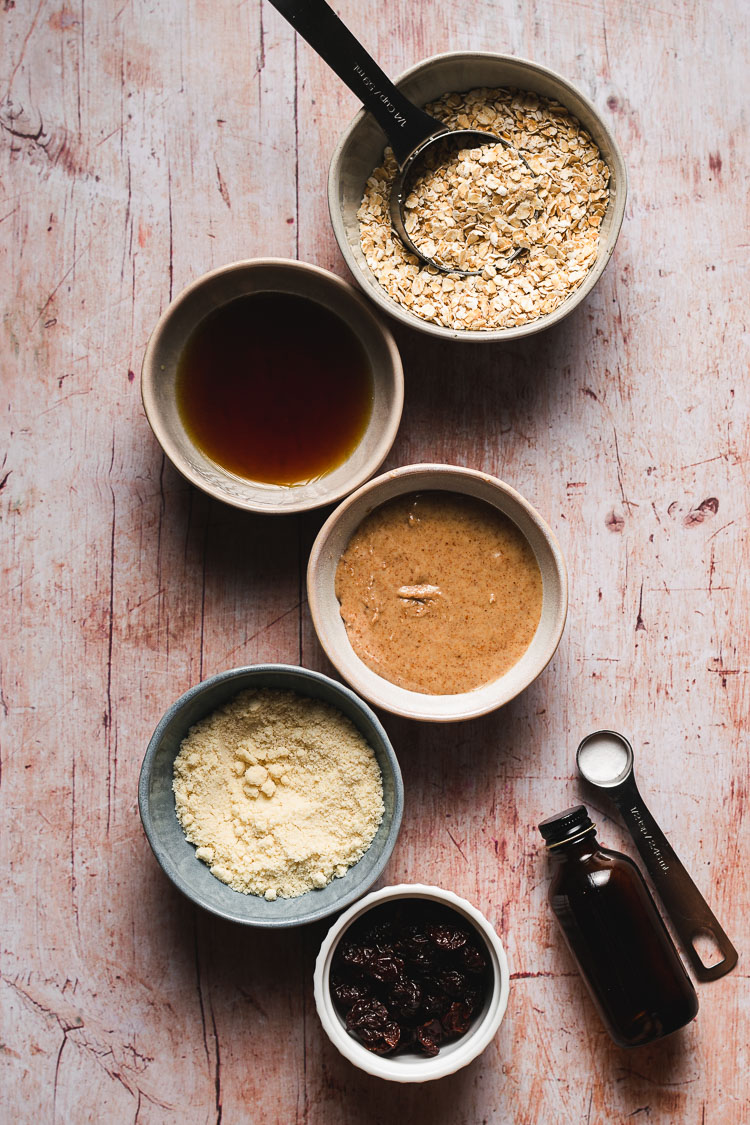
Key Ingredients
- Almond Butter ⟶ Use unsweetened. If it’s unsalted, add a pinch of salt to the cookie dough.
- Maple Syrup ⟶ Adds moisture and the perfect amount of sweetness.
- Oats ⟶ You can use quick oats or rolled oats.
- Almond Flour ⟶ Adds moisture and holds the cookie together.
- I have subbed chickpea flour with similar results. Refer to the recipe card notes.
- Plant Milk ⟶ This makes the cookies soft and chewy.
- If the cookies turn out too soft for your liking, try omitting the milk.
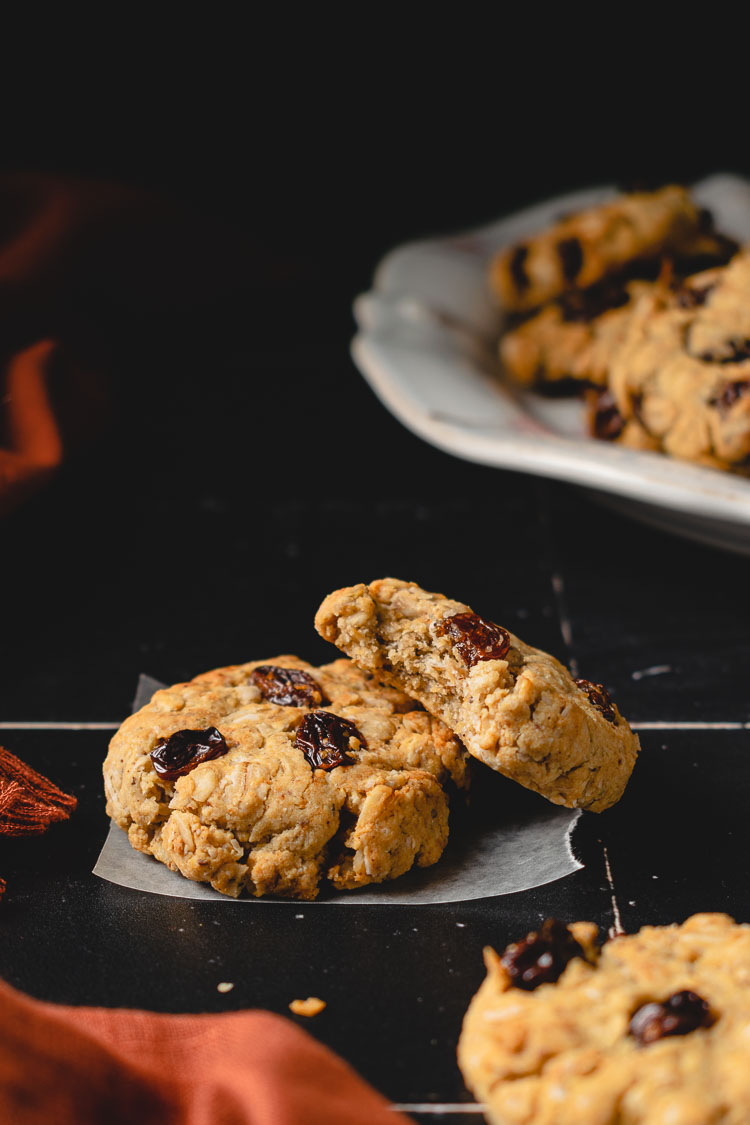
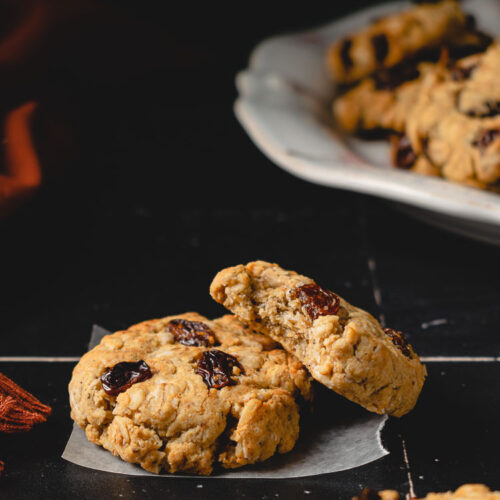
- Raisins ⟶ Feel free to swap out for chocolate chips or other dried fruit.
- If your raisins have shriveled up a lot and aren’t plump and juicy anymore, soak them in the milk with cinnamon and vanilla until they are nice and plump.

Oatmeal Raisin Cookie FAQs
Cookie dough too dry?
Add your favorite plant-based milk until a smooth and slightly sticky dough forms. You don’t want the dough to be so sticky that you can’t handle it.
No almond butter?
Feel free to swap the almond butter for any nut/seed butter you have (peanut butter, cashew butter, sunflower seed butter, tahini, etc.).
No almond flour?
Try other nut flours or you can grind your own in a blender/food processor. Just be careful not to over-grind them – you want it to be a dry nut meal consistency (it will start to turn into nut butter if you blend for too long). You likely won’t be able to grind them as fine as almond flour, but it will work in a pinch.
Tips for Success
Use smooth, runny nut/seed butter ⟶ Don’t use bottom-of-the-jar hard and clumpy nut/seed butter. If your nut/seed butter is cold and stiff from the fridge, microwave it for 15-30 seconds until runny.
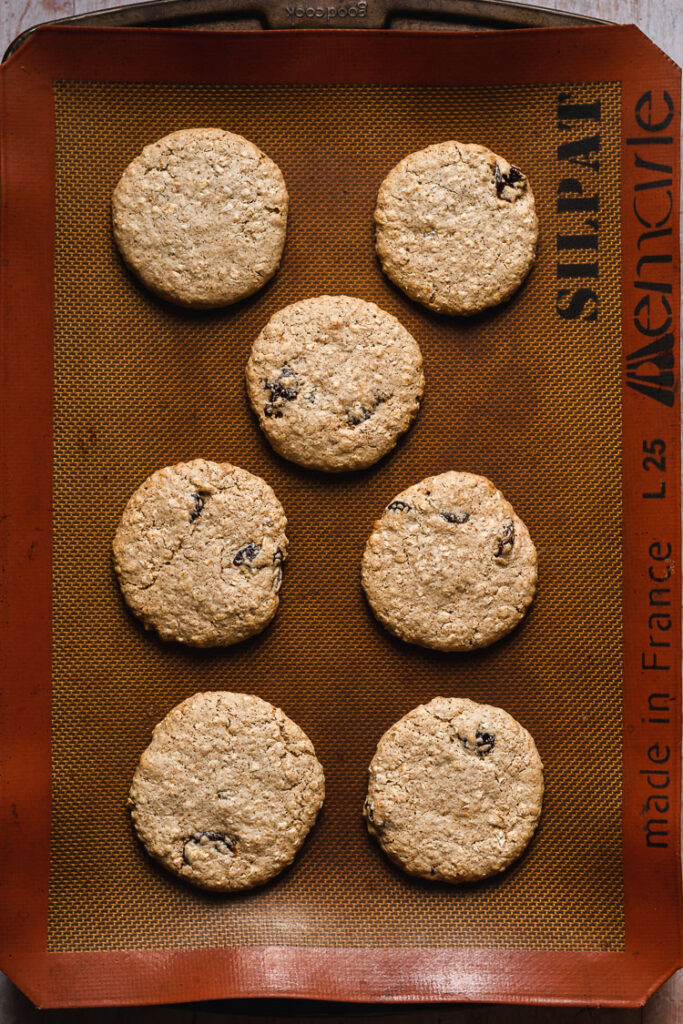
Chill the dough ⟶ Chilling the dough allows the oats ample time to absorb moisture, making the oats softer and the cookie dough less sticky. It also gives more time for the flavors to deepen and meld together.
Opt for cookie sheets that are light in color ⟶ Light cookie sheets absorb less heat. Dark cookie sheets get hot very quickly and may burn the bottom of the cookies. If using a dark cookie sheet, reduce temp to 325°F OR line your baking sheet with parchment paper or a silicone baking mat.
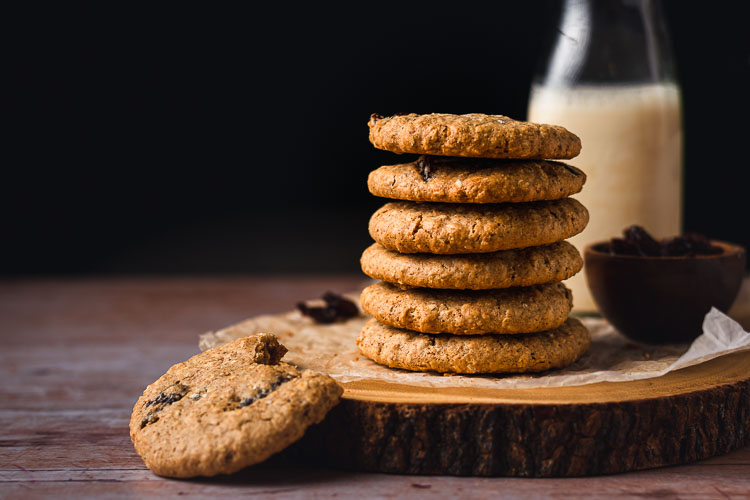
Cool completely ⟶ The cookies will still be soft in the center when you take them out of the oven, but they will firm up as they cool.
Adjust baking time/oven temp if needed ⟶ Ovens vary, so if you have time do a test bake with one cookie to see if you get the consistency you want. For chewier cookies, reduce bake time by 1-2 minutes. For crispier cookies, increase bake time 1-2 minutes. If the bottoms of the cookies are burning too quickly, reduce oven temp to 325°F and adjust bake time as needed (start with original bake time).

How to Store Cookies
Make sure the cookies have completely cooled before transferring to a container.
Short Term (3 days)
Store cookies in an airtight container at room temperature for up to 3 days. They will soften more as they sit, and may slightly stick to each other due to the maple syrup. If you want firmer cookies, store them in the fridge up to a week (I actually prefer eating them cold from the fridge).
Long Term (3 months)
Store in the freezer in a freezer-safe container or bag for up to 3 months. When ready to eat, thaw at room temperature the night before or microwave for 15-30 seconds until softened.
Helpful Baking Tools
- Silicone Baking Mat or Parchment Paper
- Aluminum Cookie Sheet ⟶ You want to use a light-colored cookie sheet, as dark colors absorb more heat, thus cookies tend to burn on the bottom more easily.
More Tasty Vegan Cookies!
- Healthier Peanut Butter Chocolate Chip Cookies (GF)
- Grain-Free Matcha Sugar Cookies (GF)
- Snickerdoodles
- Pumpkin Snickerdoodles (GF)
- Oat Flour Persimmon Snickerdoodles (GF)
- Peanut Butter Oatmeal Chocolate Chip Cookies (GF)
- Sugar Cookie Bars
I hope I’ve inspired you to give these vegan oatmeal raisin cookies a try! If you do try them out, don’t forget to tag me in your recreations on instagram @ellielikes.cooking and leave a comment down below and let me know how you liked them! I love seeing you recreate my recipes in your own kitchen 🙂 Happy baking!
*Recipe updated 10/5/22 to include milk.
Chewy Oatmeal Raisin Cookies (Wholesome Vegan Cookies)
Ingredients
- 2 tbsp soy milk
- 1 tsp vanilla extract
- ¼ tsp cinnamon optional
- ½ cup raisins
- ½ cup + 1 tbsp (144g) almond butter
- ⅓ cup (80ml) maple syrup*
- 1 ½ cups (120g)
quick oats* or rolled oats - ½ cup (56g) almond flour**
- ½ tsp baking soda
Instructions
- Rehydrate raisins: Add soy milk to a small bowl and microwave about 20 seconds until warm (but not hot). Stir in cinnamon and vanilla. Add raisins and stir to ensure all the raisins are soaking. Set aside for a few minutes until raisins are plump.
- Your almond butter should be smooth and runny. If it's too hard, microwave for 15-30 seconds until runny.
- Make cookies: Combine almond butter and maple syrup in a bowl and mix until well combined.
- Pour in the milk mixture from soaking the raisins, but don't add the raisins yet. Mix well.
- Add in oats, almond flour, and baking soda and mix until a smooth dough forms. Fold in raisins. Cover the dough and chill in the fridge for at least 30 minutes.
- When ready to bake, take the cookie dough out of the fridge and let it come to room temperature while you preheat the oven to 350°F.
- Scoop about 2 tbsp of cookie dough and roll into a ball. Place on a lined cookie sheet and flatten slightly with your hands. Repeat with remaining cookie dough, leaving about an inch of space in between each cookie. Bake 10-12 minutes.
- Let cookies cool for 3 minutes on the cookie sheet, then transfer to a wire rack to cool completely.
- For very soft cookies, store at room temperature for up to 3 days. For more firm, chewy cookies, store in the fridge for up to a week.
Notes

Disclosure: This page may contain affiliate links. As an Amazon Associate I earn from qualifying purchases, but the price remains the same to you. Thank you for supporting Ellie Likes Cooking!
Save for later!